
For the last year or so I've been slowly working on a project that started life as an awful lot of tiny pieces in some small plastic bags ...

Here's what all those tiny pieces turned into ...

This little house kit from Petite Properties is in 1:48 scale which means that it's pretty small. To give you some idea of scale, here it is with something lots of you will be familiar with - a 100g ball of yarn.

For the non-knitters out there, the house is about 15 cm wide and tall and about 10 cm deep (6 x 4 inches). It's a proper little dolls house in miniature. Would you like a tour? Of course you would. At one side there's a small scullery ...

... and this is the back of the cottage ...

I particularly like the bay window and the little porch over the front door.
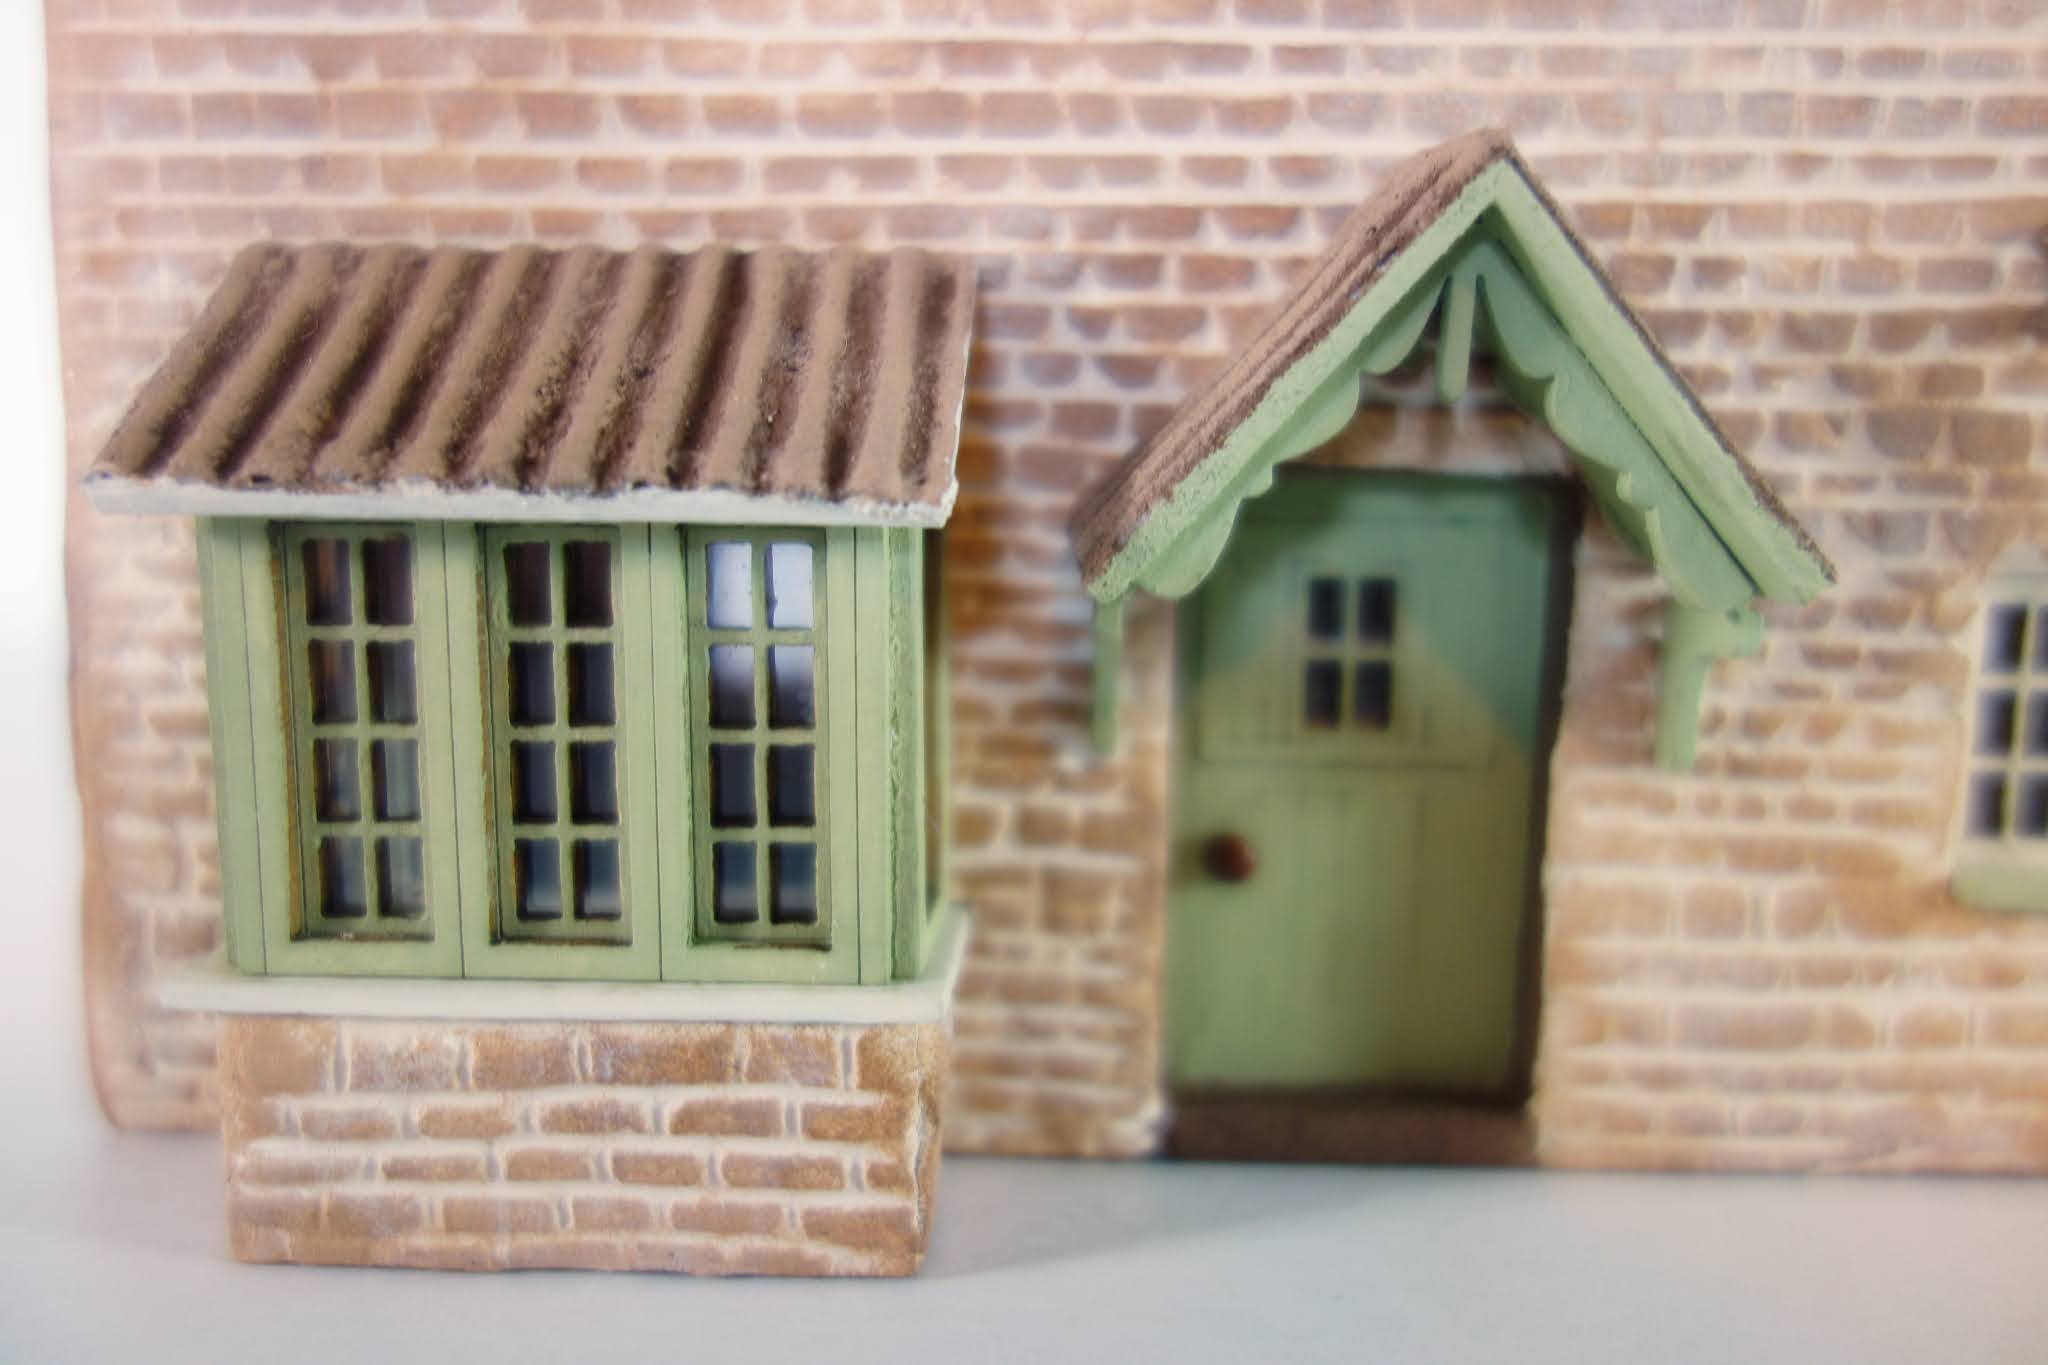
To get to the rooms, the front wall and part of the roof comes off.

I chose this particular house because I liked the stairs in the cupboard; I once lived in a house like that.

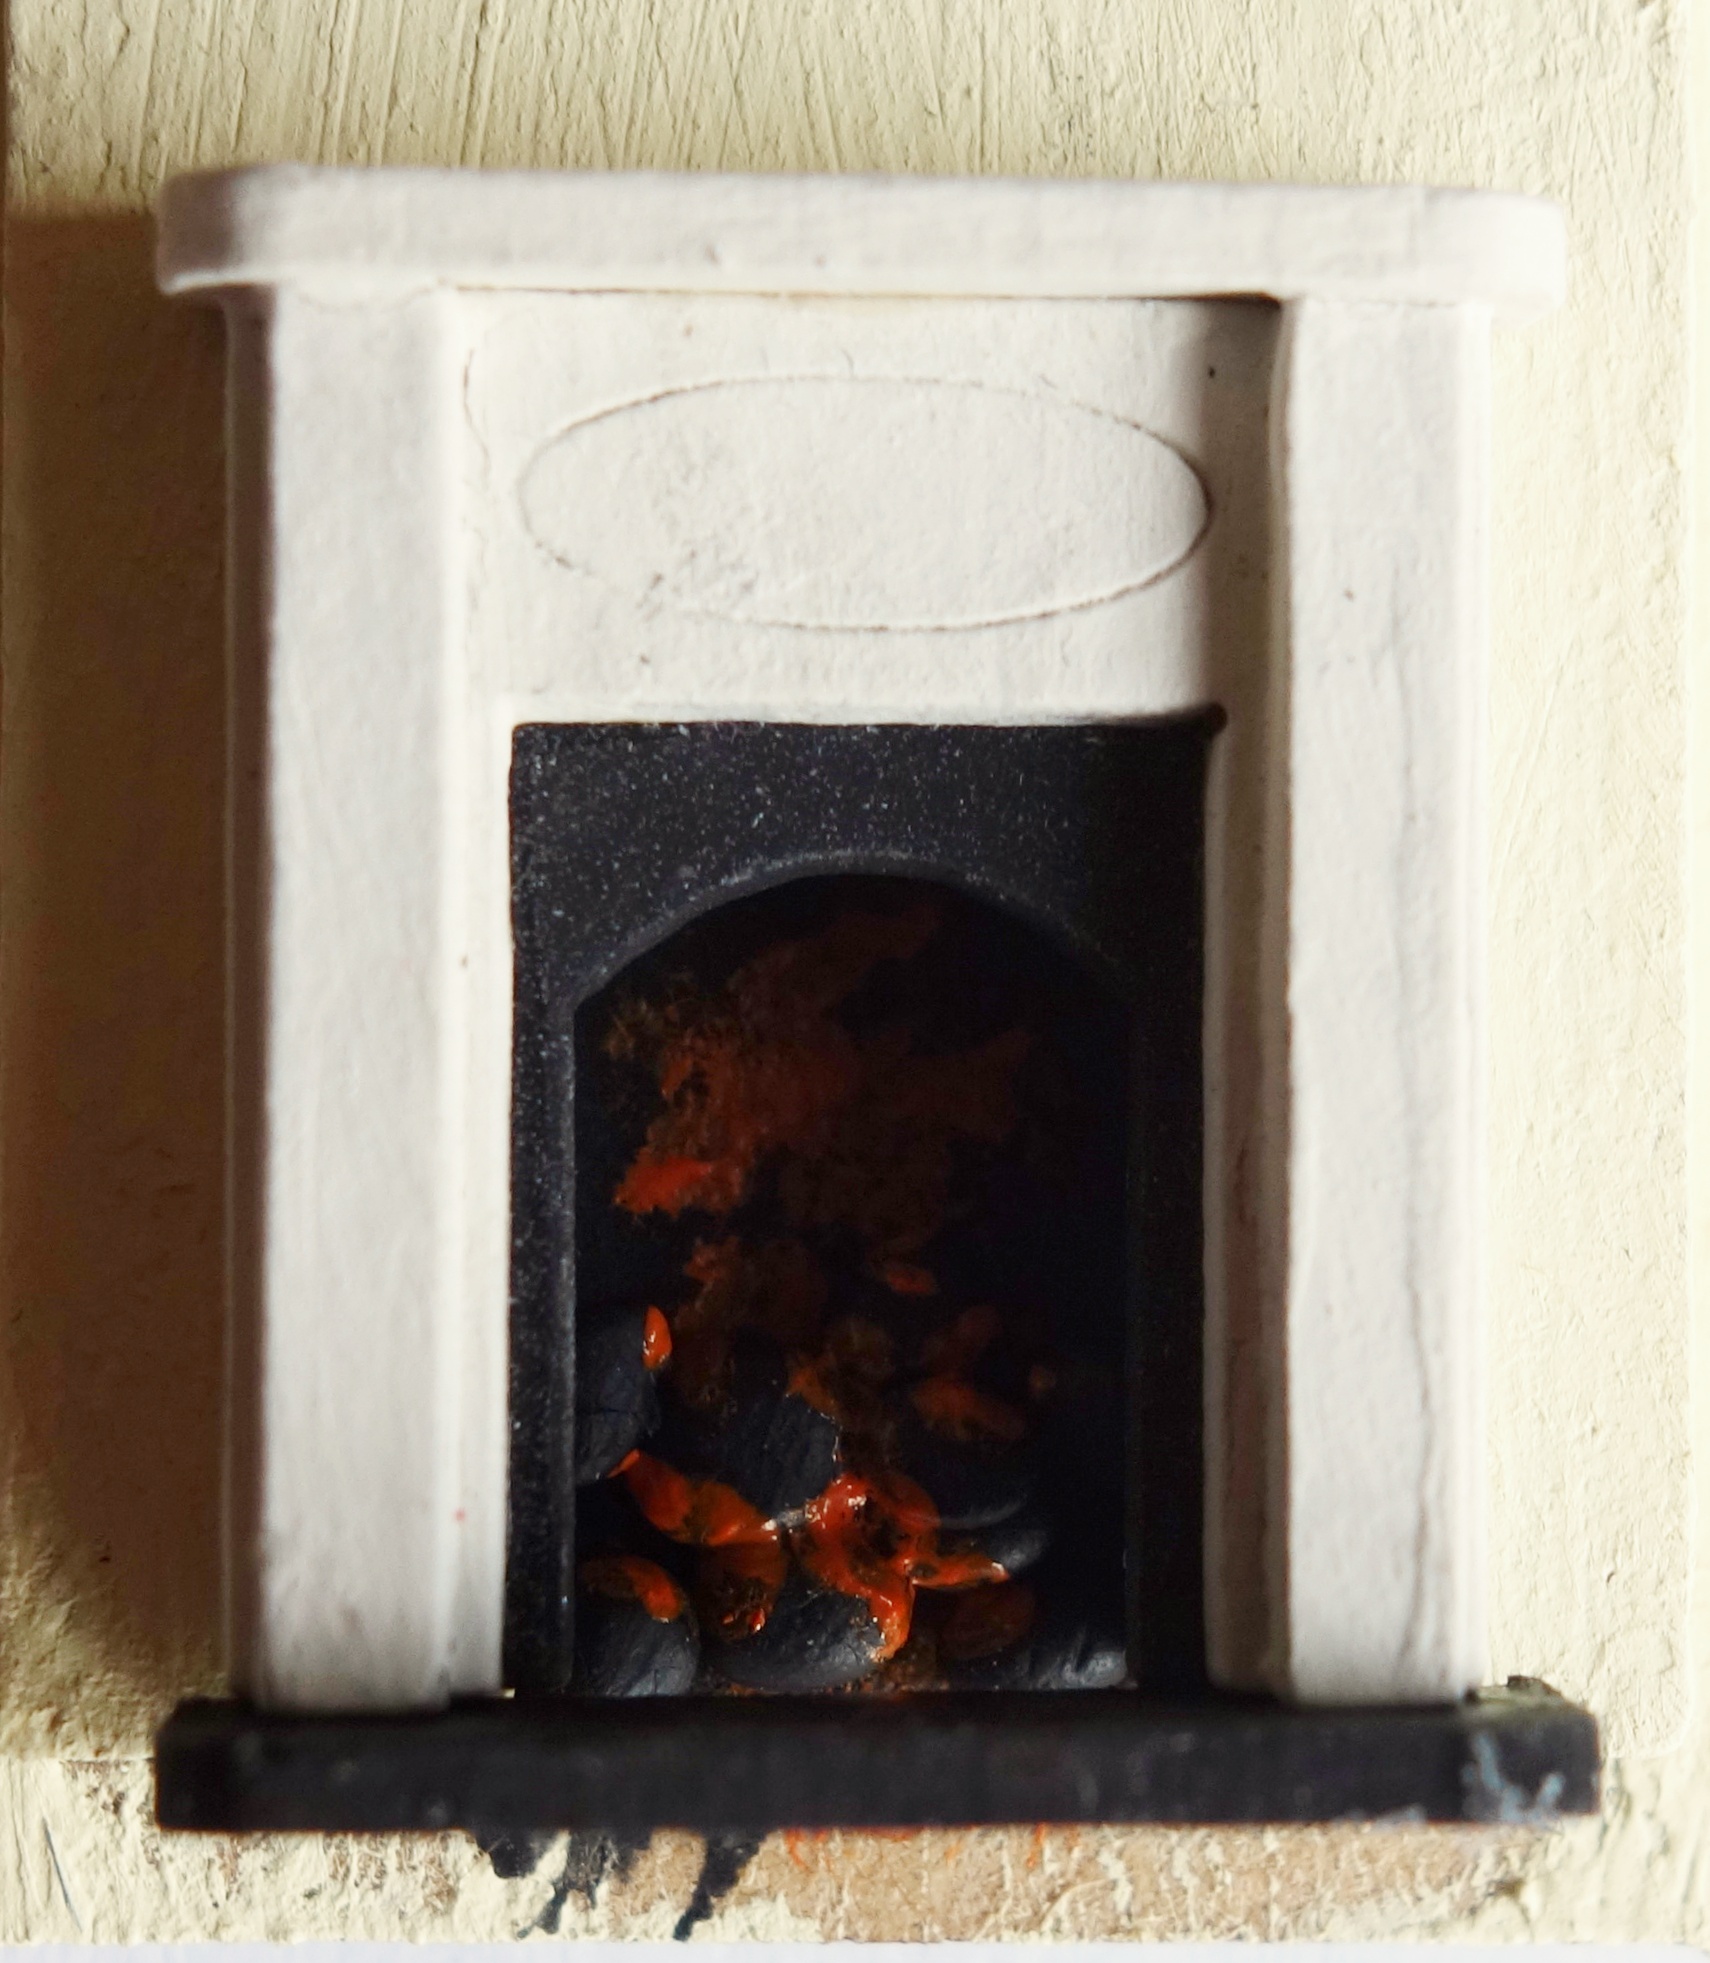
There are tiny fireplaces in three of the rooms which I built fires in. I couldn't get a photo of them inside the rooms so here's one taken after I'd made it.
At the back of one of the downstairs room, there's an open door showing just a glimpse of the scullery.

The roof lifts off the scullery too so that you can see inside.

This turned out to be the perfect long term project for me at the moment. Long Covid means that I struggle with anything that I have to concentrate on for too long but I could do a little bit of painting and leave it to dry, glue some pieces together ... As this was the first time I'd tried building a miniature house, I needed to take it very slowly anyway so that I could check and re-check what I had to do next.
I made lots of mistakes and learnt an awful lot in the process. I'd paint a bit, then mess it up with the next bit - I was constantly touching up the paintwork. I nearly put the windows in back to front and had no end of trouble with the brickwork.
I nearly didn't even try that brickwork but in the end I found a bit of wood to practice on and had a go. You plaster the outside walls with cheap filler (the expensive stuff dries too quickly and too hard) and then carve the lines of the bricks on it. I used a loom knitting tool for this.

The carving was a very messy business - dust everywhere - and lots of the bricks crumbled as I worked. I decided that this would just look like wear and tear and left them like that. Once the bricks are all marked out, you paint the whole thing with the mortar colour and then sponge paint various brick shades on top.

Isn't that clever? I saw Bea Broadwood from Petite Properties demonstrating this technique at the Miniature show I went to a few years ago and I'm so glad I finally managed to do it. Here are all the parts of my house covered in bricks.

The chimneys were really tricky to do as they're so small. I realised afterwards that I could have stuck them on to something to give me something to hold. This is the sort of thing I put in my notebook which is full of things to remember another time - mostly because I did them wrong this time. Those windows shouldn't have been put in until after I'd done the brickwork for example.
When I came to gluing the parts of the house together, I came up against another problem, how to hold the pieces at the right angles while the glue set. This is where Lego bricks turned out to be useful. I could rearrange them into props and supports for every task.

See the days and the month on the bricks? That's because I dismantled my Lego calendar for this - April had to be cancelled this year.
I was rather proud of my floorboards. I worked out a way of dry brushing, using various colours to paint my own. The cracks between boards and nail marks are pencilled lines.

That floorboard recipe has gone down in my notebook too, complete with a sample on card so that I can do it again another time.
The brickwork may have been time consuming but I found Bea's technique for the roof was simplicity itself. It consists of corrugated cardboard, covered with fine sand and then sponge painted. The ridges at the top are cocktail sticks.

My corrugated card was bright yellow and I discovered that, with a thin coat of brown paint, it looked like an old rusty tin roof. I've made a note of that in case I ever want to make such a thing - a Shepherd's Hut perhaps?
Now all I have to do is furnish my house. I'm going to buy the furniture as kits to make and paint myself and then I'd like to make someone to live in there ... Once I've done all that, I shall have to decide which house to build next. I'm torn between a house with a garden like Gardener's Cottage or The Little Duck House or something like Privet House which, with its mid twentieth century styling, would make a good 1940s house.
I love the house and am eager to see it with furniture. I sincerely hope that you will be knitting little tablecloths and bedspreads and (my biggest hope) a tiny gnome for the front step. I do not have enough patience to do any of that, including the house itself, but I know you do and I can't wait to see it!
ReplyDeleteI'm not sure about the gnome but I do hope to make all sorts of bits and pieces for the house.
DeleteMy Mam bless would have followed your progress with wonder zhe was a huge dolls house fan....I will follow for her and myself xx.....
ReplyDeleteThat's good to hear.
Delete