Showing posts with label Buttons. Show all posts

Thursday, 9 October 2025

Sam's Blackbird

As a change from all the yarn based craft, I thought you might like to see a little quilt that I made recently as a birthday present for my daughter's partner.


It measures about ten inches square, the same size as the robin quilt I made for my daughter Rose earlier this year.


The robin was paper pieced but I couldn't find a paper piecing pattern for a blackbird that I liked. It didn't help that I wanted it to look something like this ...


Rose took this photo of a blackbird helping himself to some of their wild strawberries this summer so I wanted the blackbird on the quilt to be a strawberry thief too. I decided that I had to applique the blackbird but first came a lot of very bad sketches. Should he have one wing or two? One foot or two? Visible feet obviously, we're not talking disabled blackbirds here. Decisions, decisions.


Having decided on one wing and two feet, I set about sewing the black pieces to a square of hand dyed green fabric. I inherited my Mum's quilting fabric and I can nearly always find just I want amongst it.


Then I had to embroider the legs, beak and eye which took a lot of experimenting. I can't get at my stock of black seed beads at the moment (they're in one of the piles in the room I'm currently decorating) so his eye is actually a glass toy eye, threaded through a tiny piece of felt and mangled on the back of the fabric so it lies flat. The beak is layers upon layers of orange stitches; I kept adding more until it looked about right.


If you look closely you can see that the blackbird is holding a tiny strawberry in his mouth which I cut out of printed fabric. I added a few stitched leaves and then had to embroider a few more straight stitches in black to fill in the shadows in is mouth. 

That was the trickiest part of the project finished. Naturally, Mum had several pieces of strawberry patterned fabric so it was easy to find something for the borders. The quilting thread I chose was hers too; one of the range of variegated threads from YLI. It's sold as machine quilting thread but it works beautifully for hand quilting too which is what I do.


I drew rough leaf shapes meandering around the blackbird for my quilting design. I just use an ordinary pencil for this and make it up as I go along. I also quilted round the blackbird and gave that wing a bit of texture too.


Then I quilted the borders with straight lines and added a binding to finish the quilt.


As you can see, the quilt hangs from a wire hanger. In order to be able to take the hanger off if wanted, I only attached the fabric sleeve at the top of the quilt and then used snap fasteners to close it below the bar of the hanger. This was something I worked out when I made Rose's quilt. You can't really see the bottom of the sleeve in this photo but it's about where the little strawberry button is. The button serves no purpose but I thought it was nice.


I even managed to find a piece of fabric with little blackbirds on for the quilt label and then, as a finishing touch, I printed out Rose's photo on fabric and sewed that to the back too.


Sam was very pleased with his blackbird quilt so that was good. Now I need to turn my mind to the next mini quilt ...

Saturday, 14 June 2025

Daisy Time


It's that time of year when my garden is at its wildest and even I start to think it might be time to cut the grass. I have to wait for the Ox-Eye Daisies to flower first though and they're in their full glory right now.

This is the view of the garden from my bedroom. The bottom half is a bit tamer and you might just be able to make out the winding cat (and human) path that goes through the middle of it. All the visiting cats keep to it, including Violet who doesn't live here but thinks she does. I have to keep the back door shut if I'm upstairs or she wanders in and helps herself to Tolly's food.


As well as the daisies, my roses are all flowering now after a slow start because of the lack of rain this Spring. Here's Kew Gardens all mixed up with some Love-in-the-mist and a Geranium.


Next to it and hiding behind another rose is one of my short foxgloves. I know, they're meant to be taller than this but all mine only grow this high. Maybe they give up once their roots hit the heavy clay soil? 


The big leaves by the wall are some of the Hollyhocks that I planted this year. These look like they might be a more respectable height anyway. I bought them from the plant stall in our market which has really nice plants that you can get when they're small (and cheap). I'm very lucky to have that stall nearby now that I can't drive to garden centres as I used to. I do have to enlist help to carry my purchases though as I can't carry things and breathe at the same time.

This is Buff Beauty which lives on the other side of the garden and has lots of coffee coloured flowers. David Austin roses aren't cheap but they are really good quality and grow quickly even when planted as bare roots. 


Just up from this one is  my rose in a cage ...


I planted The Pilgrim inside this big obelisk about three or four years ago and it looked ridiculous sitting at the bottom. It's being making good progress ever since though and the frame is doing a good job of supporting it.


Yellow roses are my favourites but what I call marmalade coloured ones come a close second. This one is Lady of Shalott and is holding its own against the wild daisies now that it's got a bit bigger.


That's more hollyhocks next to it; these ones aren't as tall as the others yet although they all started off the same. Isn't this a gorgeous colour?


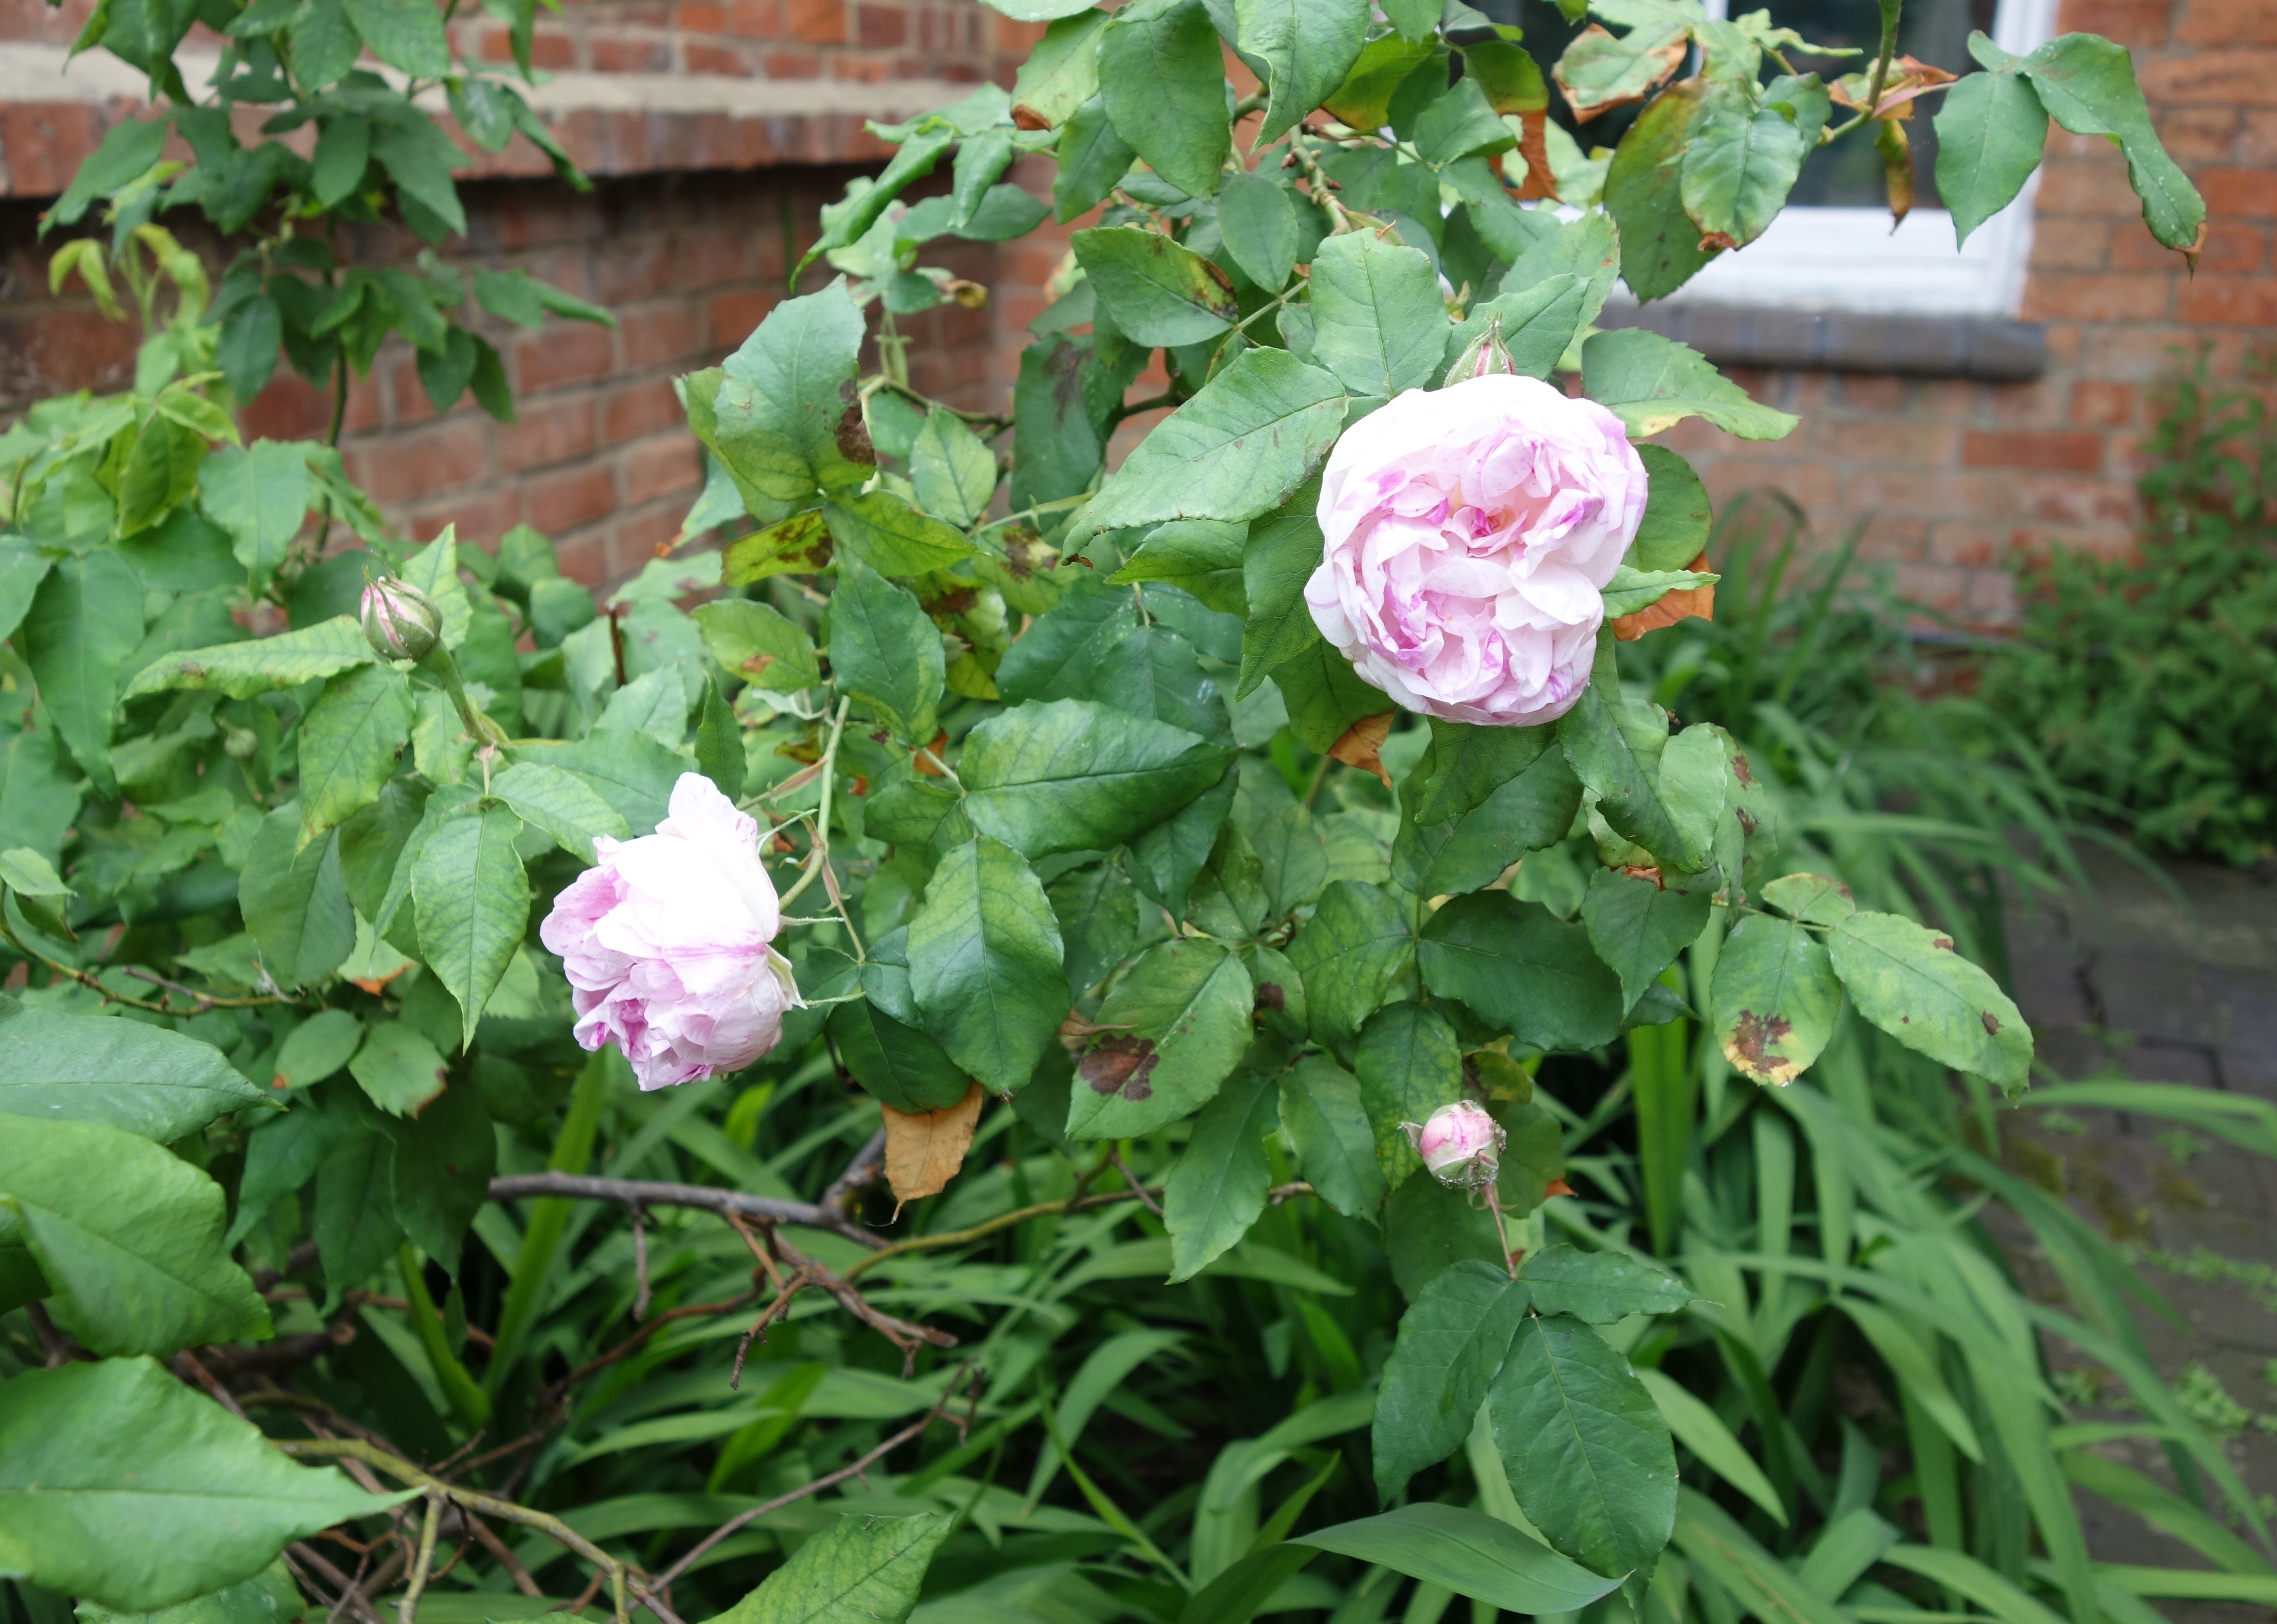
Tucked down by the side of the house where it gets virtually no sun is a rose that has been in this garden longer than I have. I'm not sure of its name - possibly Maiden's Blush although the pictures I've seen all look more pink than mine which is very pale. That could be down to it to being in a shady spot perhaps?


Last Spring my daughter helped me plant three new bare root roses in the front garden, two more yellow with a white one in between. They flowered last Summer which I hadn't been expecting but have really come into their own this year.


This is the wonderfully named Tottering-by-Gently and, next to the gate, is The Poet's Wife.


Apparently, this one has a nice scent. I try to buy scented roses even if my Long Covid means that I can't smell them. Passers-by can enjoy them. The white rose in between (White Flower Carpet) is a ground cover rather than a shrub rose so it only just reaches up to the railings at the moment. It's absolutely full of blooms though.


This year I planted two Lavender Hidcote plants in between these three roses. They're tiny at the moment but they will grow. I particularly wanted the Hidcote variety as they reminded me of a lovely day spent at Hidcote Gardens back in the days when I was well. It's a series of little gardens, almost like rooms, each with their own character and style and I spent a long time wandering through them.


In between admiring my daisies and roses, I've been crocheting flowers. Some big ...


... some small ...


... and some absolutely tiny.


These ones are crocheted with a 1 mm hook using size 20 Lizbeth tatting thread. The buttons are about half an inch across. I got the idea from Diane's blog - if you search 'button flowers' on there you can see hundreds of lovely examples. I enjoy reading a blog by someone else who does lots of different crafts like I do. Anyway, I just used part of the pattern for my bigger flowers to make my little buttons. I want to make more of these but I'm going to order a more comfortable hook first. I find thin metal hooks tricky to grip so I shall get one of my favourite Clover Amour hooks to play with.

Friday, 10 March 2023

More Colour Pops

I'm still enjoying exploring the possibilities of my Colour Pop technique which combines lots of colours and some serious texture, two of my favourite things. The first two patterns were purely decorative: a rainbow wall hanging ...


... and a Christmas tree.


Now I'm turning my thoughts to more practical applications of the technique, so my latest pattern is for chunky little purses.


Roly-Poly Purses are beautifully tactile and very easy to make. You just knit a rectangle of colour pops and then gather the ends and add buttons to close it. I loved the simplicity of this project. Here's the knitted rectangle; the wrong side with its pretty lines will be the inside of the purse.


I knitted three different widths of purses from the basic pattern, using the same colours for the pops but changing the background colour. These are going to be very useful for holding little crafty bits and bobs of which I have many.


I think the next colour pop pattern will be a tea cosy. Those textured rolls would keep the heat in well.

At the moment though I'm trying to get various projects finished that have been hanging around too  long. Do you remember my crochet Starburst blanket from last year? 


I had little balls of all the colours leftover when it was finished so I changed the mosaic design to a smaller star with lines, bought more black yarn and made a smaller version to use up the colours.


As you can see, I've got as far as crocheting the squares together so I just need to add the border and give it a serious blocking - it's very lumpy and bumpy at the moment. I think it's going to be a bit small to count as a blanket but I may turn it into a little rug. I don't know what to call it though. Any ideas?

I've just bought some new yarn for a crochet shawl too. This is Scheepjes Whirl which is a combination of cotton and acrylic and comes in a big cake of 1,000 metres of yarn. This colourway is called Rose water Cocktail. Isn't that a delicious name?


Before starting on this, I've been playing around with new crochet stitches, courtesy of an ebook version of the Big Book of Crochet Stitches from the Martingale sale. Have a look, there are some real bargains there. The terminology is American so I have to concentrate a bit but it's definitely expanding my crochet knowledge.

As I told you last time, I've also been using my new / old Singer sewing machine to make a quilt for my son's new house. It's to go over his coffee table which is, unfortunately for me, quite big so this is turning out to be a bigger quilt than I normally make. The top is finished now and I'm waiting for the wadding I ordered to arrive so that I can get started on the quilting.

Saturday, 18 February 2023

Bit by Bit

It's been a while since I posted here. It's hard keeping up with things when you're always ill and it doesn't help that I haven't been able to sort out a place to take decent photos in my new room yet. I set up a rather haphazard arrangement yesterday which involved the cables from my big lights stretching across the room at knee height and, miraculously, I managed not to fall over once! So, here are some of the things I've been working on lately, a little bit at a time most days.

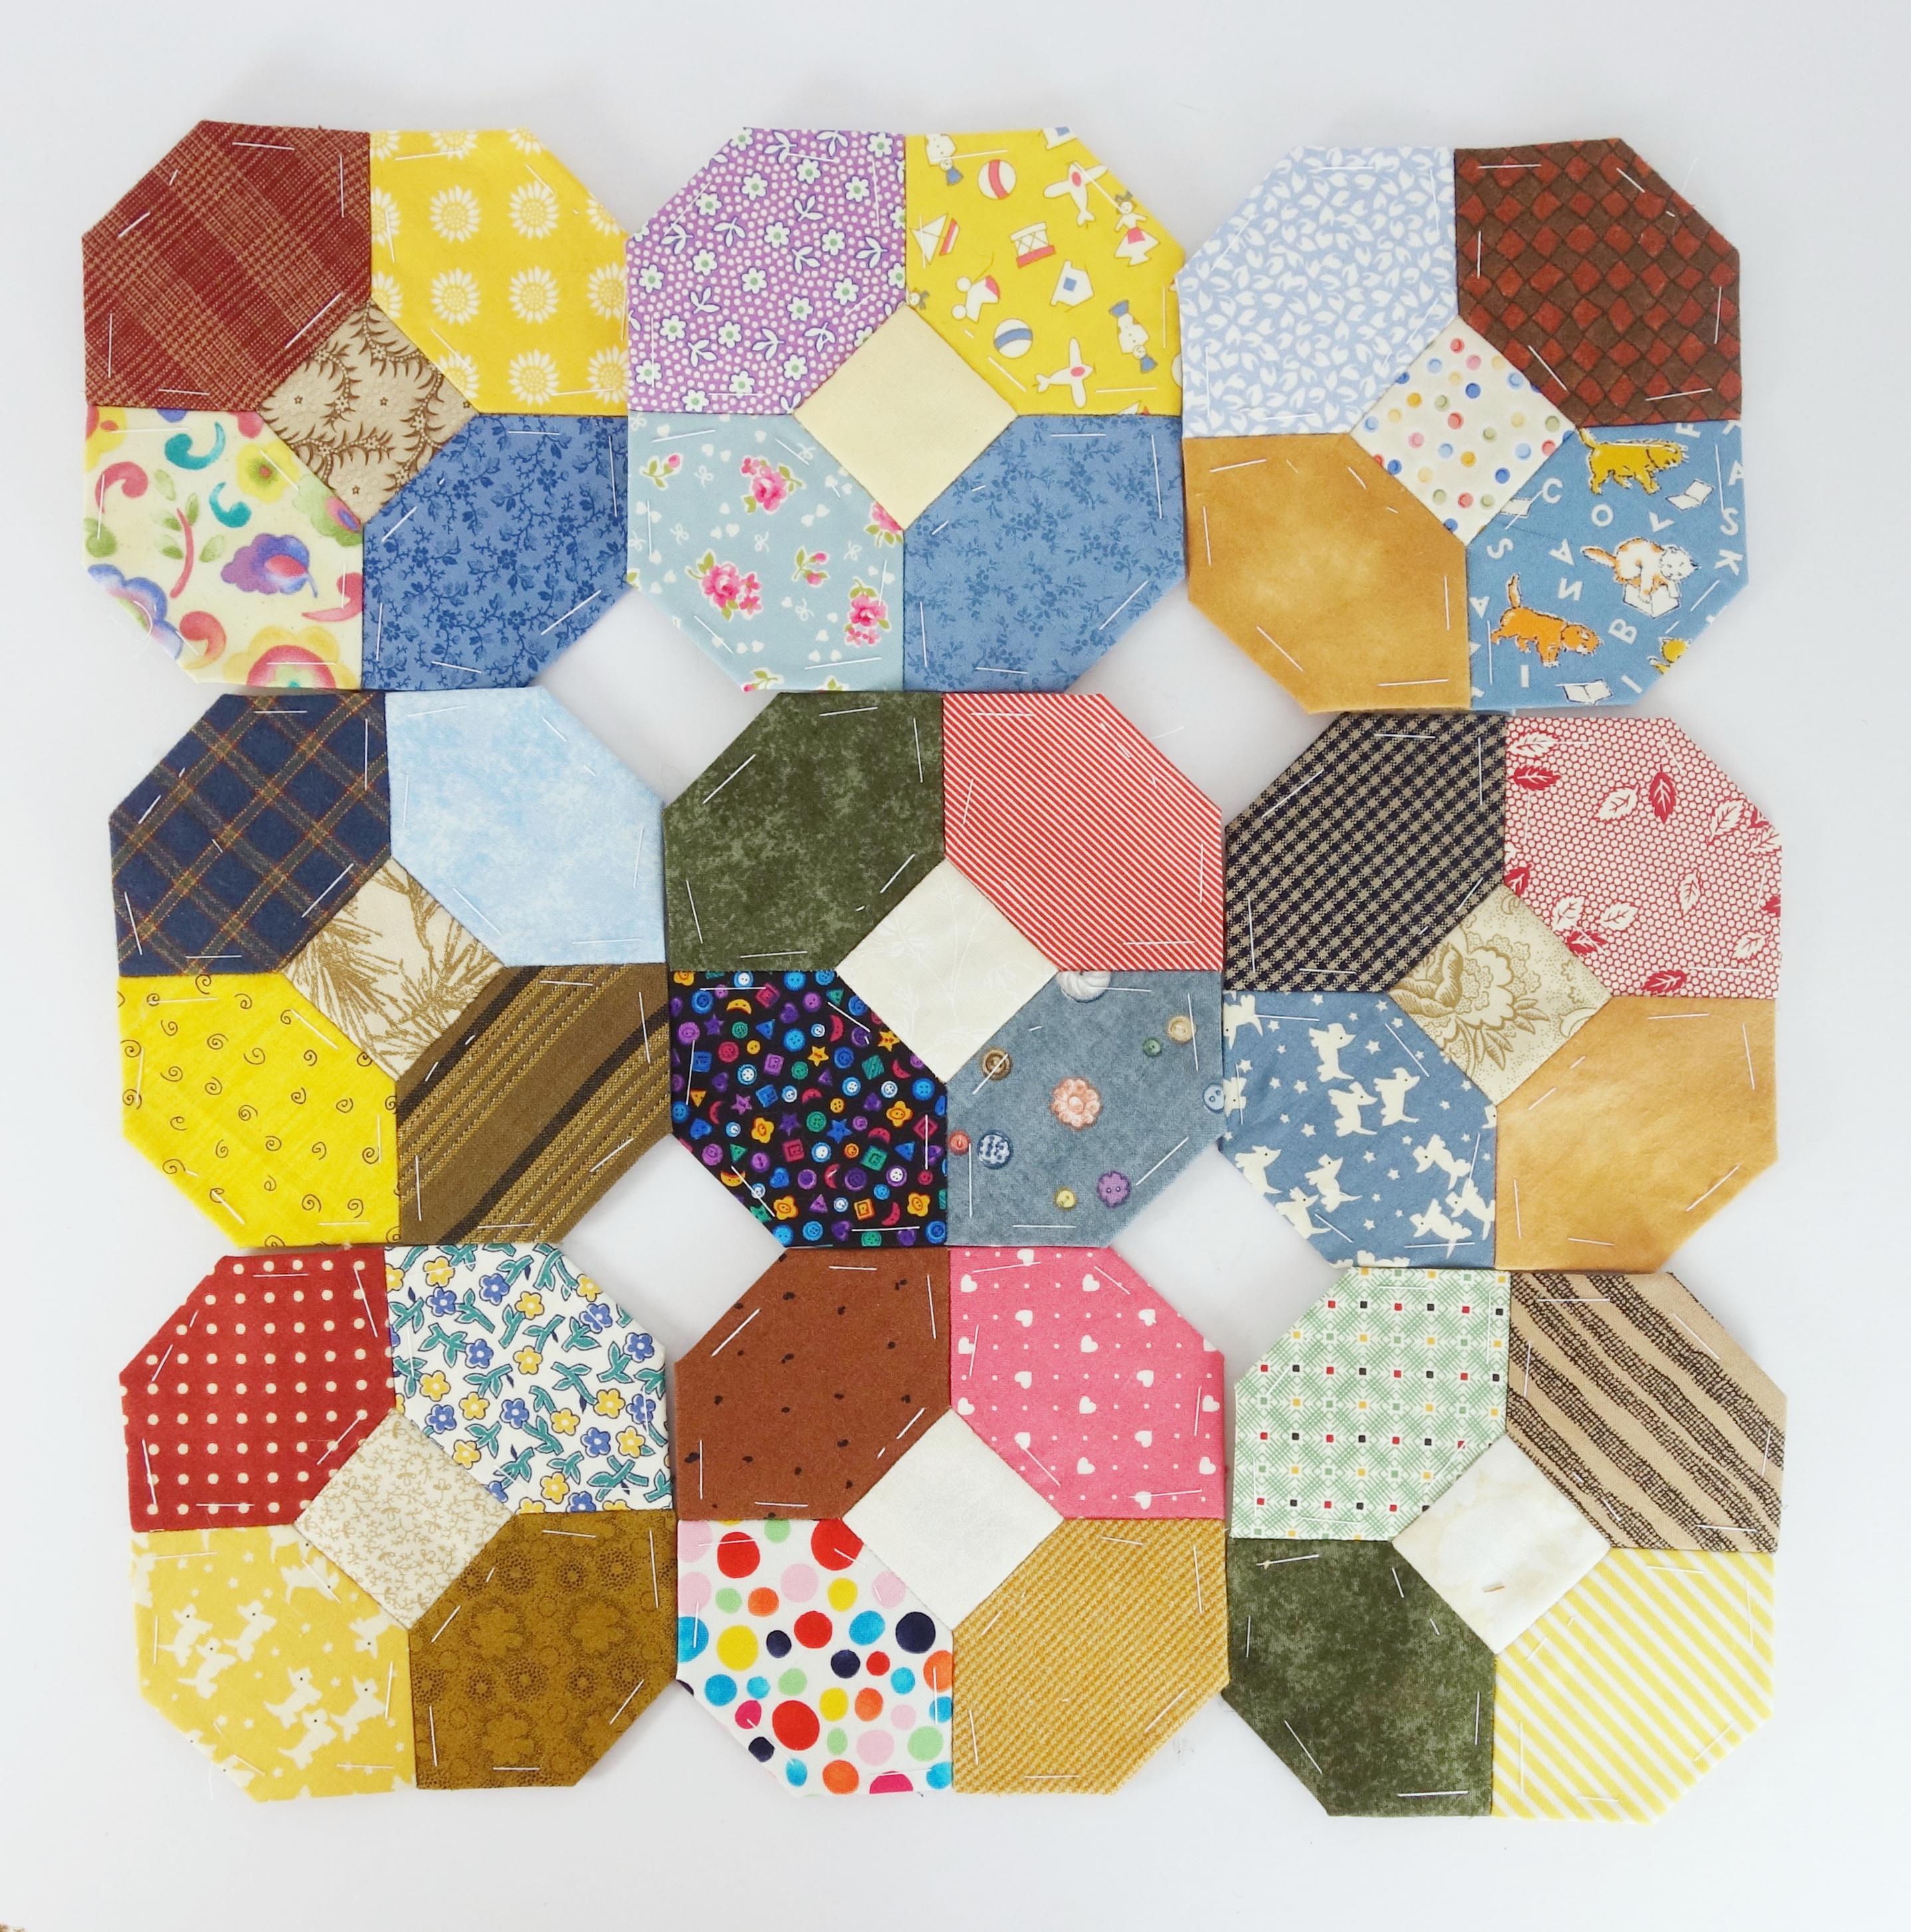
First of all, I've been doing some English paper piecing with scraps from the two big baskets of scraps on the top landing (needless to say, both baskets are still full).


I'm using pre-cut squares and honeycomb paper pieces from Sew & Quilt and, so far, I've tacked enough shapes to make 50 blocks. I've been better pleased with my stitching since discovering this extra fine thread by Gutermann which really makes the stitches invisible. I shall arrange the blocks like this so will need to add extra squares between the blocks later.


One of the things that bothers me about doing so many crafts is that I never really make any progress with some of them. If I only practise them once or twice a year, there's always a lot of re-learning to do when I go back to them. This year I've decided to be more consistent so that I develop the muscle memory for some of my often neglected crafts.

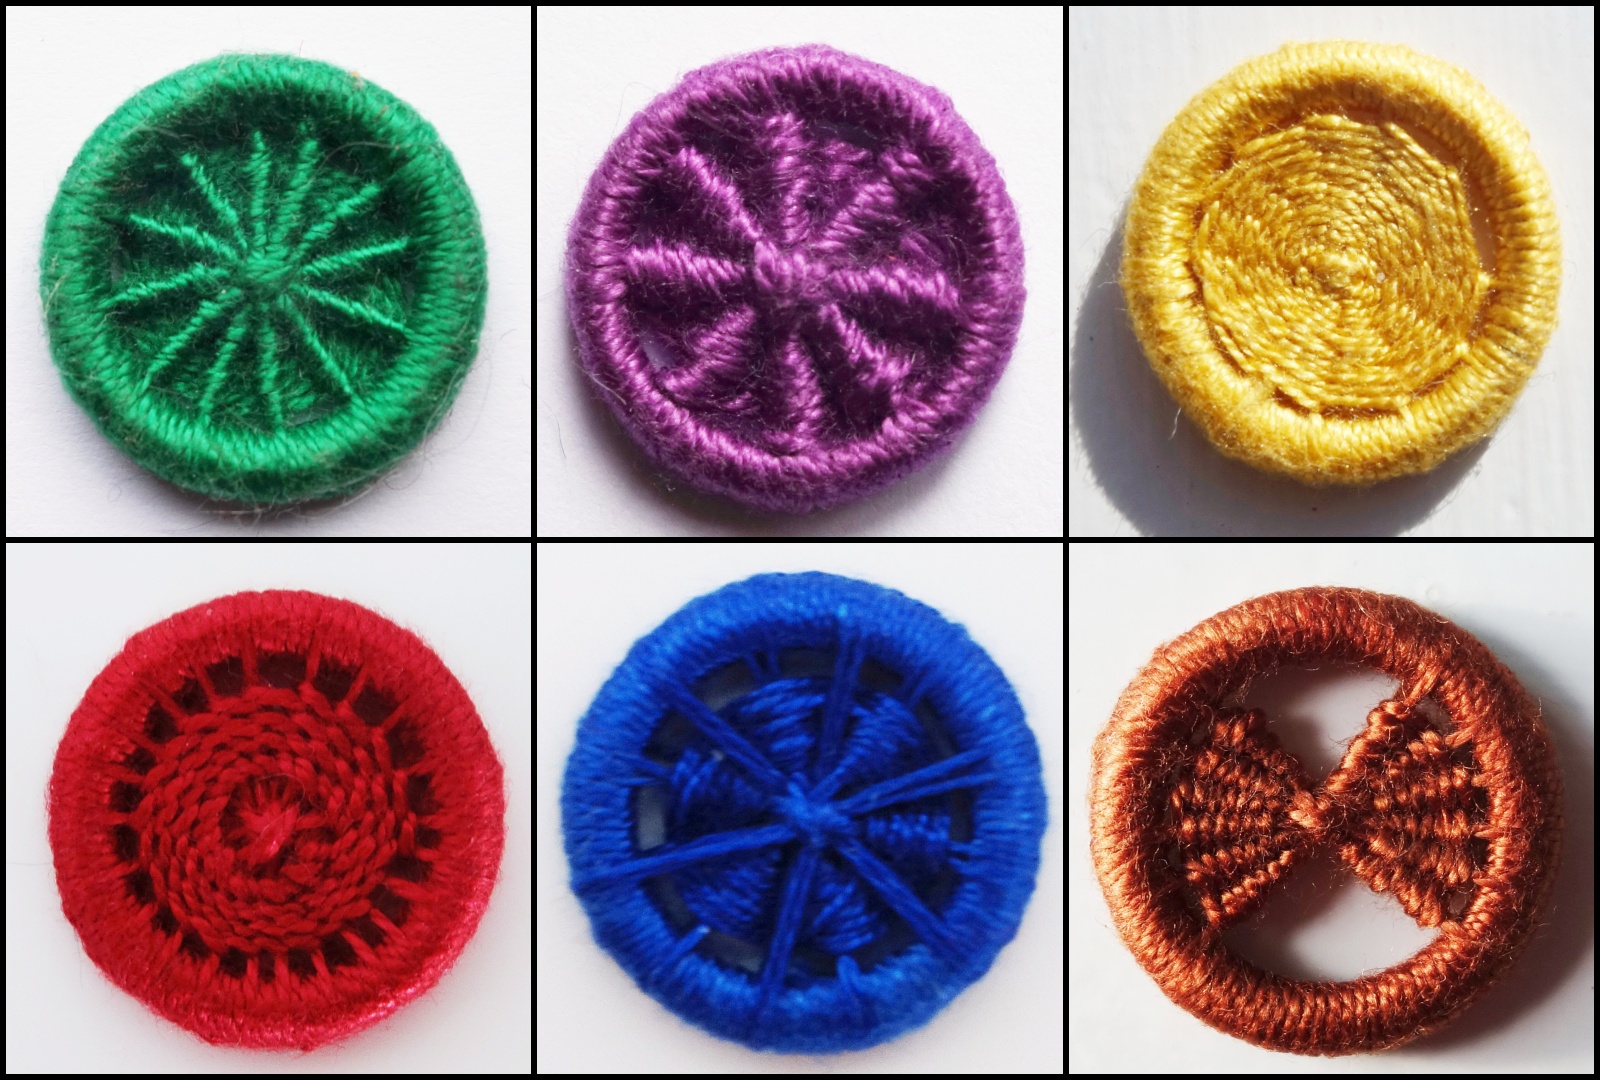
This is working well with Dorset button making. I am steadily working through this wonderful book by Gina Barrett which has detailed instructions for over 70 traditional buttons.


As you can see, I've made eight so far so there's quite a way to go. Here's a close up of the first six.


I'm trying the same approach with tatting but this is a much steeper learning curve. I'm trying to tat this motif over and over and then use the finished shapes as gift tags. As you can see though, my second attempt is worse than the first! More practice needed I think.


The design is 'Christmas Rose' from the book New Tatting by Tomoko Morimoto which, I'm sorry to see, is now out of print. This was the book that re-sparked my interest in tatting although I would also recommend any of Mary Konior's wonderful books. Don't be put off by the black and white photos and the lack of diagrams, these are brilliant for beginners in particular. The prices that old copies of her books go for tells you something about how good they are but you can find them reasonably priced now and then. I recently found this one on World of Books for just over £6.


The author helpfully marks patterns suitable for beginners with a dagger symbol so I obediently had a go at the first one in the book - an edging called 'Betsey's Downfall' (poor Betsey).


That was easy. It's so small because I was using up a length of thread on a bobbin, not because I got bored. Even I have more staying power than that.

I've been doing a bit of the next ongoing project every day since just before Christmas. Can you guess what's in this pretty tin?


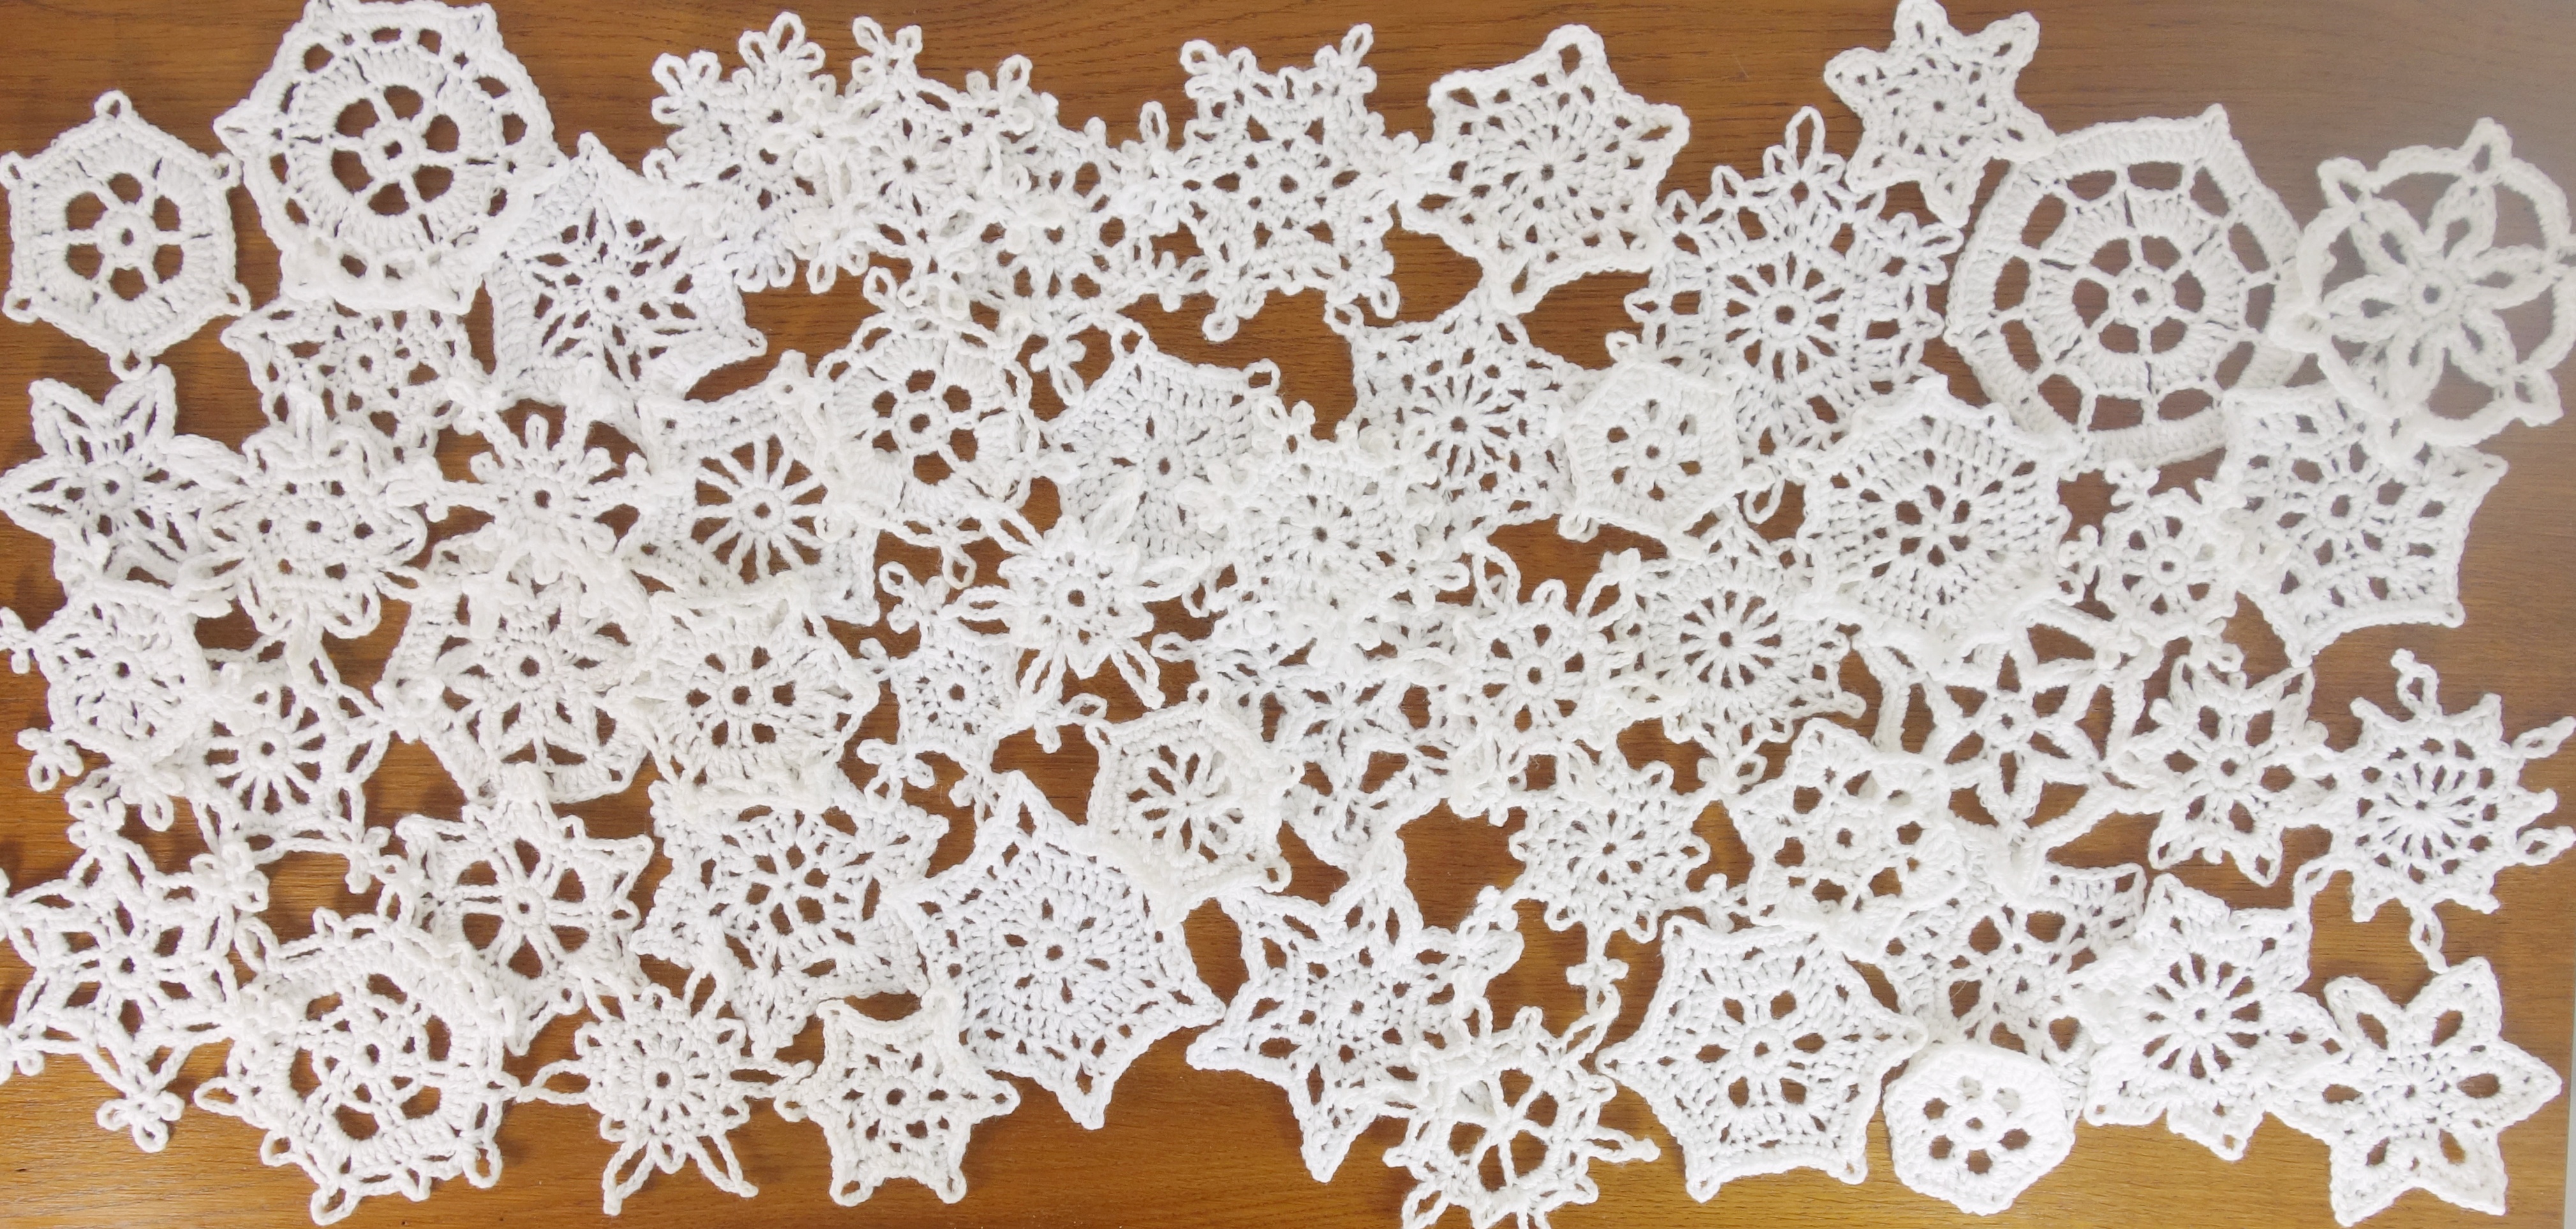
Appropriately enough, it's full to bursting with ... snowflakes.


Every day I crochet another design from 100 Snowflakes to Crochet by Caitlin Sainio. Again, I fear this book might be out of print. When I first got the book several years ago, I started crocheting the snowflakes with thread as the author recommends but I didn't really like the result so, this time, I'm using Stylecraft Special DK and a 3.5 mm hook. They don't take long and I'm over half way through the book already and learning a lot about snowflakes on the way.

What am I going to do with 100 quite large snowflakes you may ask? Good question, I haven't decided that yet. I am considering sewing them together into big panels to hang at my windows next Christmas although I suspect that it would be a case of 'that way madness lies'. In the meantime, don't they look nice?


I have also been working on more Colour Pop knitting ideas. This is my technique for adding texture and colour to plain knitting which I have been exploring for a while now. You can see the Colour Pop patterns I've published so far here although I did experiment with the idea in a few early patterns too.

At the moment I'm knitting Colour Pop squares for a baby blanket using some very pretty colours ...


.. and I've also finished a collection of Roly-Poly purses using  the same technique.


I'm particularly pleased with these as they're just one rectangular piece with the sides gathered into circles and a few buttons added - nice and simple. I'm hoping to get the pattern written up soon.

Have you ever considered using 92 different colours in a knitted scarf? Of course you haven't but this is what I'm doing here ...


This is my shade card scarf which will have a stripe in all 92 of the solid shades of Stylecraft Special DK. I'm knitting it in the round, mostly so that I can knot the ends together and hide them inside. I may be daft but not so daft they I relish the thought of sewing in 184 tails of yarn.

I'm not very good at doing 'random' when it comes to colour selection so I decided to knit the colours in alphabetic order (and why not?). What you see in the photo above is letters A - C. Adopting this approach throws up some very bizarre combinations but I think it will all turn out well in the end.

I use my trusty Stylecraft Colour Pegs a lot when planning designs and they're starting to look a bit fuzzy and tatty now so I'm also crocheting these little circles to act as an alternative to the pegs.


I was going to do just plain squares but they seemed a bit dull so decided on textured circles instead.

I am still making progress with sorting all my piles of craft stuff on to shelves in my new room although I'm finding it slow going. It doesn't help that I think I've slipped another disc so lifting things is tricky - also moving, sitting, sleeping ...

Anyway, this is the state of the big shelves so far.


I've done cross stitch, needlepoint, embroidery, tatting, beading, toy making and I don't know what else but there's still quite a lot to go. Meanwhile, there are a few new additions to my desk. One is this pretty clock from Dunelm Mill which I'm rather pleased with.


The other 'new' thing is actually 67 years old and I've had it for a while.


This is a Singer 99, made in Scotland in 1956 which I've finally got cleaned, oiled and working. This was advertised as a 'portable' machine, despite being made of cast iron (guess how I hurt my back?) but, with a new foot pedal from Couling Sewing Machines, it sews beautifully. I'm planning to have a sewing machine on every floor of the house. This one on the top floor will mostly be used for patchwork, as will my Featherweight which lives in the scullery downstairs and is nice for sewing by the open back door in then Summer. That leaves my modern machine - yes, I do have one of those too - for the middle floor. That machine comes into its own for dressmaking, bag making etc. Also, you don't do yourself an injury moving it around!

I have plans to keep the old Singer out all the time in my craft room but am hoping to move it off the desk, possibly to that little space to the left of the desk in this photo.


Today I had a lovely time cutting out rectangles to start a new quilt for my son who has just bought his first house so that will be the first thing I make with this machine. I'll show you pictures once I've done more than cut out pieces.