For about two months now I've been working on some patchwork curtains for my craft room. I started sorting through piles of fabric in March and finally got the curtains finished and hung at the window yesterday.
When I began I had no idea just how time-consuming this project would be. Just choosing the fabrics took ages and then I had to iron it and cut all those squares. I was planning to end up with two panels of 96 squares (8 x 12) and I wanted a mixture of dark and light colours. To simplify things I decided to use the same fabrics in both panels so that meant cutting two 8" squares from 96 pieces of fabric. I managed to cut about eight pairs a day.
The next stage was to lay out one lot of 96 squares on the floor to work out a pleasing arrangement. To make this easier, you need to get as far away from the layout as you can (this involves steps and / or furniture climbing) and then either take a photo or look at it through the wrong end of a pair of binoculars. That way, any unbalanced sections will jump out at you. After a bit of swapping the squares around, I ended up with this.
As you can see, Linnet was a great help. I pinned the squares into piles, one for each row of eight squares and got ready to start sewing.
As I was aiming for a stained glass effect, I didn't want any raw edges visible where the squares joined so I used a double seam called a Flat Fell Seam. This is the seam used on jeans - everyone wearing jeans, have a look at your legs and you'll see what I mean - and it worked well, even if it added hugely to the sewing time.
First you sew your two squares together with the wrong sides facing; I drew a line ¾" from the edge on the square I was adding and sewed along that. Then you press the seam flat and trim the seam allowance on the new square to about ¼". I just did this by eye. The next stage is to fold the first square's seam allowance so that it comes just short of your seam and press it, then fold it over again and press that. Now you go back to the machine and top stitch that fold down. It took me about an hour to join a row of eight squares and then add it to the row above so, again, I added one row a day.
As well as taking ages, these seams also use huge amounts of thread. I lost count of the number of times I had to change the bobbin on the machine but it was an awful lot. That was when this little machine came into its own.
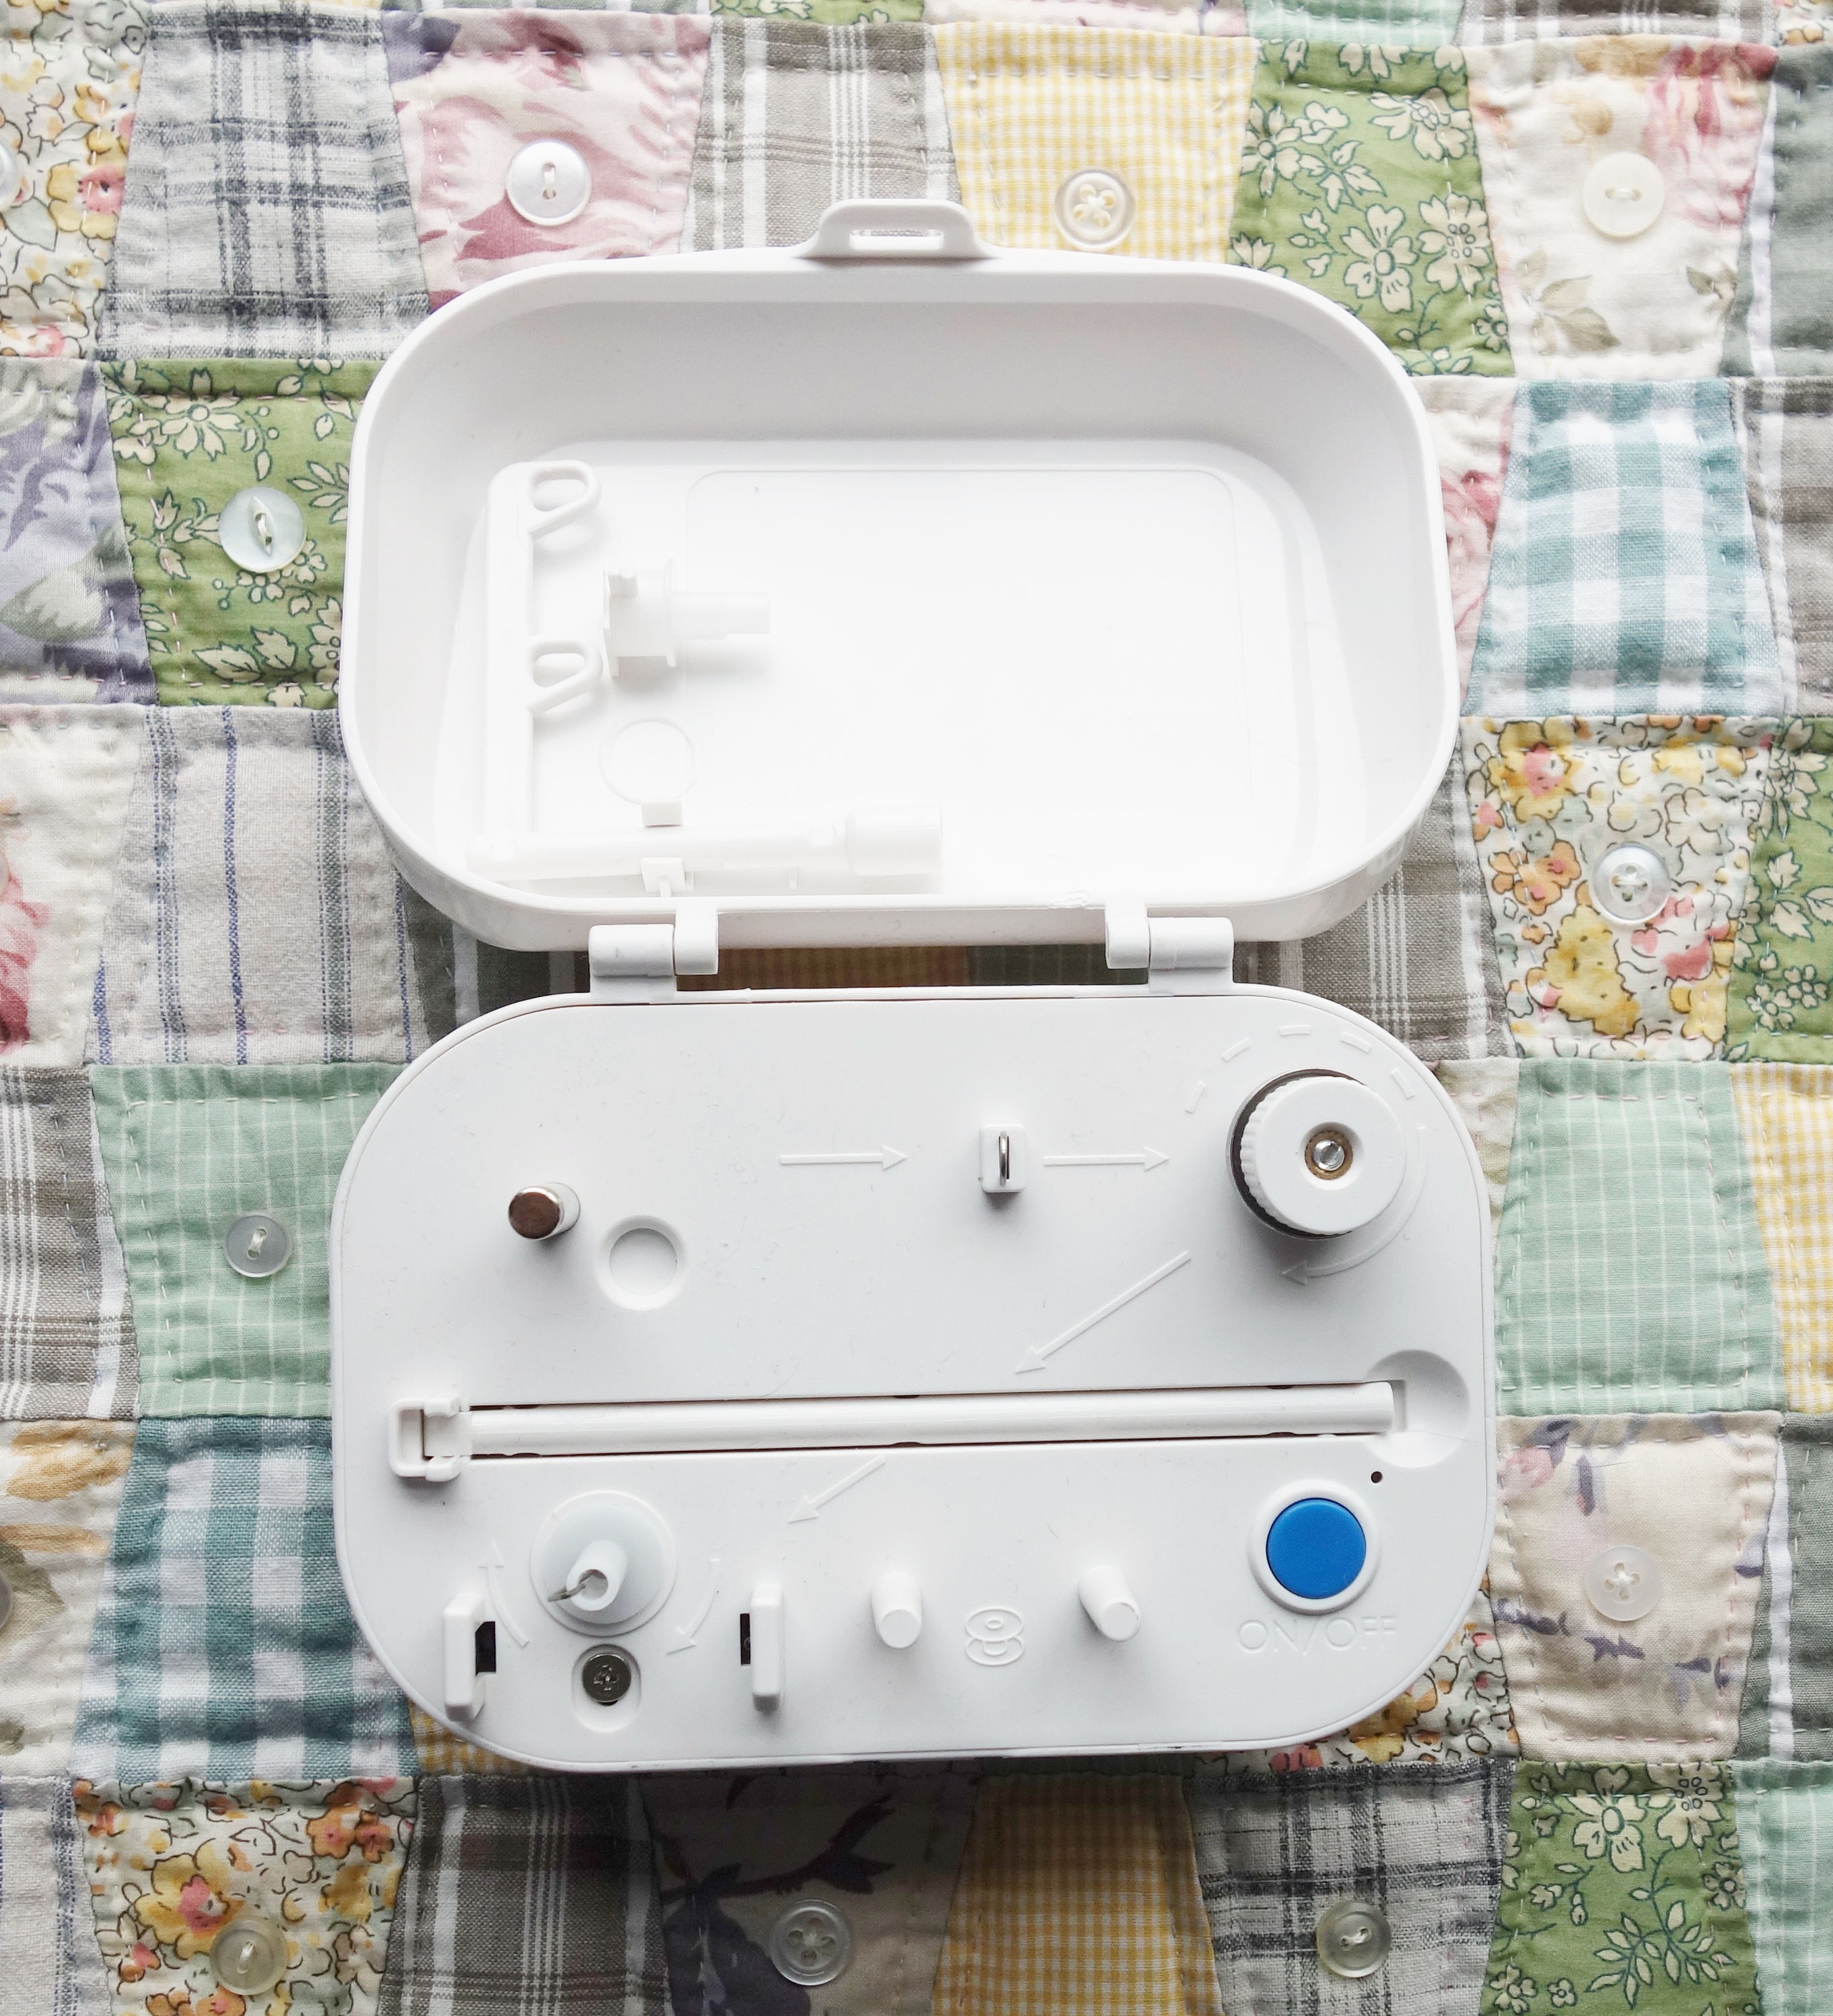
This is a battery operated
Hemline Bobbin Winder and it's absolutely brilliant. I'd always hankered after one of these - I do love a gadget - but told myself it probably wasn't necessary and wouldn't be any easier than winding the bobbins on the machine. Turns out I was wrong on both counts. It works like a dream, winds the bobbins more quickly and smoothly than my machine does and, of course, saves you having to stop in the middle of a seam to wind a new bobbin and then re-thread the machine.
This is what it looks like inside. You fold up the rod in the middle, attach the sticky out bit stored in the lid and pull up the spool holder. Then you follow the thread path on the machine (you might just be able to see it in that photo above) to attach the bobbin to the spool, press that blue button and it does the rest.
I didn't have to persuade the thread to fill the bobbin smoothly and it stops automatically when the bobbin is full. You can wind lots of bobbins in one sitting which saves even more time.
So ... I checked the length of the curtain after the tenth row and decided I only actually needed elven rows, not twelve - hurray! Once the first panel was done I pinned it over the curtain rail to see what it would look like.
Yes, definitely stained glass. Even the rather wishy washy colours showed up brighter than I'd expected. The visible squares between the seams are 6"².
The next problem was working out how to arrange the squares for the next panel. I tried a straight copy and then flipping the pattern horizontally but neither of those worked. In the end I flipped it vertically so that the individual rows were the same but the top row became the bottom, the second to top the second to bottom and so on.
This is just an image I generated on the computer to test the layout; Now I had to actually sew the second set of squares. By the time I'd done that, I had a huge pile of fabric trimmings ...
.. and it was time to work out how to finish the edges. The first problem was that the edges were wider on the left sides and the tops than on the right and bottom edges. As I was double folding the edges and top stitching them twice, this gave me very little to play with if I wanted to keep the visible squares the same size as all the rest. I just about managed with the side seams and then had the bright idea of turning the panels upside down so that the shorter bottom edge became the top (where it would be hidden by the curtain tape.
I was still sewing one seam per day but, by the time I'd added the second lot of curtain tape yesterday, I decided just to get on and finish them. Luckily, they both hung to the same depth (not always the case in this wonky house) so the hems were quite straightforward to sew. I then picked over both curtains for trapped and stray threads of which there were a lot before ironing the curtains and hanging them up.
It was a grey and gloomy day yesterday when I took this photo but, even so, those colours really glowed. I then flaffed around with some ribbon and brass rings to make a pair of simple tiebacks and I was done.
It's difficult to take photos that show how lovely these curtains are; they really brighten up the room and are a lovely splash of colour when I walk in the door. All that work was worthwhile.


Stunning curtains x
ReplyDeleteThank-you. They are a lovely splash of colour.
DeleteYour curtains turned out beautiful!!
ReplyDeleteThank-you. Yes, they're nicer than I thought they would be, especially as I was making it up as I went along!
DeleteAn awful lot of work, but what a wonderful result! I love the look of your curtains.
ReplyDeleteYour curtains really are like stained glass - bright jewels with seams acting as the dark lead in between. How happy they must make your room look. Lovely. Georgie Bull
ReplyDeleteThank-you Georgie, yes, I'm very pleased with them.
ReplyDeleteI agree with everyone else, the curtains are beautiful!
ReplyDelete