Showing posts with label Weaving. Show all posts

Friday, 7 August 2026

Sticks of Wood

 Last week I spent £264.70 on lots of sticks of wood.


To be fair, they are sticks of wood with a purpose. Most of this pile became a stand for my weaving loom.


And some of the little ones made shelves to clip on each side of the stand. They even have a slot to hold your scissors.


I'm on a mission to make my weaving easier to do and less painful for my back, hence the stand. I'm not sure I would have bought it just for this loom but it comes with an extra brace for the bottom so that it can also be used for the bigger sizes of Ashford Knitters Looms too. It just so happens that I have a 20" loom in my sights for the future so this is good.

I've had my loom for years. You can tell that because it has the blue plastic parts, rather than the more grown-up (and boring) brown ones they switched to quite a while ago. I have woven lots of scarves on this loom but I've been wanting to branch out beyond plain weave for some time and also to try sewing with handwoven fabric.

Rather than worry about what to make I've decided that sampling is the way to go. I'm going to try lots of the techniques in Jane Patrick's wonderful The Weaver's Idea Book. The first one I did was a long warp with lots of different pick-up stick patterns which were so exciting to do.


Who knew that you could weave all sorts of textures just with an extra stick of wood? Well, lots of people probably but it was news to me. Needless to say there were two more pick-up sticks in that pile of wood ... and a few more shuttles too. 

Not only is weaving samplers very freeing - you can make all sorts of mistakes and poor choices and learn something from them all - but it will give me lots of practice with warping. I want to train my muscle memory so that I can do it more easily and it would be nice if it didn't hurt my back so much too.

This leads to one of the other benefits of getting the loom stand. I can use it when I'm warping the loom. Before this I've always had the loom on a little low table or stool which wasn't the best thing for my back. Now I can put the loom on the stand which makes it just about level with the table that I clamp the raddle to. 

Once the warp is on the loom, it needs to be wound on which used to be very difficult until I bought this little device.


The plastic block clamped to the side of the loom is one of a pair that hold four dowels which control the warp as it's wound on so that the threads stay in order and the tension isn't messed up. This next picture shows it with the first two dowels in place.


As you can see, these go under the warp while the other two sit on top of it. Then the tops of the tension blocks are screwed down and off you go. I bought mine from Etsy; you get the dowels yourself as they have to be cut to suit the width of your loom. The first time I used this system I followed the instructions which said to take the warp off the raddle before winding and this resulted in crossed threads so I wasn't very impressed. This time I left it on the raddle and let the stand with the loom on move across the floor towards it as I wound. 

The next problem I had was when the loom met the end of the table the raddle was on. I'd planned to take the loom off the stand at this point and move it on to the table but the clamps holding the tension blocks on were in the way. Finally, I came up with the bright idea of putting a heavy book across the warp and then taking the ends off the raddle. The book was heavy enough to keep the tension but light enough to move with the warp as I wound.


Best of all, when it came to tying on the warp ends, I didn't have anywhere near as much trouble sorting out the tension across the warp. It normally takes ages trying to get an even tension but not this time. So, what with the new stand and the warp tensioner, I had a much easier time warping the loom for this sampler. It still took me hours mind but I'm hoping to get quicker with practice.

Ready to weave.

This sampler is yet more pick-up stick patterns, some of them calling for more than one stick - oh the excitement. I used King Cole's Bramble DK for the warp; the shade is Cloudberry. Then I've been trying all sorts of plain colours in the weft but they all looked horrible. The best of them was black but I didn't like even that.


There was too much going on with all that contrast and texture for my liking. Also I ran out of shuttles. I had to filch some from the old Spear's Weaving Loom I bought at Orinoco a few months ago.


This is actually a 16" wide rigid heddle loom. I have yet to have a play with it; the first thing is there isn't a stand for the heddle so I'm wondering if I could rig something up. Anyway, in the meantime, it gives me four extra shuttles.

Yesterday I decided enough was enough and switched to using the same yarn for the weft as the warp and it's settled down nicely. I can see the texture better despite the variegation in the yarn. 


I absolutely love weaving so it's good to be able to find ways to make it easier to do. At the other end of the scale I'm still enjoying my self-imposed task of weaving 20 hexagons in each of the 20 shades of Bramble to make a big blanket. So far I've woven seven lots - that's 140 hexagons. Here are the first 120 ...


.. and the seventh set, Blueberry ...


This is the little loom I'm using for my hexagons, together with the shade I'm using at the moment which is Heather. The loom is the fine sett original hexagon from Turtle Looms which is probably my favourite pin loom.


I didn't hink this shade looked particularly exciting but I've been loving seeing how the hexagons come out. I've had everything from dark green, through shades of purple to something that reminds me of raspberry ripple.


Four more to go and then these can go to join the others. I started off with a small basket, then this bigger one and it won't be long before they have to move again.


I have to say a big thank-you to my daughter who turned that pile of sticks into a loom stand for me on her last visit. Not only that, there was also this waiting for her ...


She turned this pile of sticks into another folding step stool for me. I have one on the middle floor but have been wanting one on the top floor for ages as that's where my craft room is. Climbing on and off a chair to reach things is a pain. So now that will be easier too. These are great stools; the step folds up inside so it can also be used as a small table.


That's it for now. Happy weaving to fellow weavers and, if you're not a weaver, why not?

Tuesday, 19 August 2025

Weaving a Bag

I've been doing a lot of pin loom weaving lately. I showed you some of my hexagons recently but I've also been learning how to weave shapes together on Weavette style looms.


Using a mixture of online instructions - none of which quite answered all my questions - and an awful lot of trial and error, I finally got the hang of it. This is what I made ... 


... a rainbow tote bag. As you can see, I used twelve different bright colours as well as black for contrast. The colours continue on the other side of the bag.


I used two Hazel Rose looms for this project, the two inch square multi loom and the two by six bookmark loom. 

Things I learned from making this bag:

        Trying to weave two black shapes together on the loom when you're not entirely sure
        what you're doing isn't a good idea. 

        You need to cut a very long length of yarn to join the big rectangles together which 
        leads to much tangling and  muttering.

        Fusible interfacing works well with woven fabric if you're going to sew the pieces 
        together. If you're planning to crochet them, you need to stitch the interfacing down.

Having said that, I enjoyed working out how to put the bag together as I went along. Having blocked the pieces and backed them with interfacing, I crocheted round the edges and then slip stitched them together. At the top of the bag I added a crab stitch edging to make it a bit stronger.

It took a while to work out what to do for the handles. In the end I joined two six inch rectangles and two little squares in black for one side and eight little squares for the other - six colours with a black square at each end. The handles didn't come out quite the same length (presumably because of the different number of joins) so there was more blocking and a lot of counting out loud as I crocheted along the edges to make sure they would match.


Inside each handle is a length of webbing to strengthen it. I just had enough black in stock to make the two handles. For extra stability I lined the bag with fabric. I was pleased to find this rainbow fabric amongst what we refer to as 'Grandma's Quilt Shop' i.e. the fabric I inherited from my Mum.


I'm very pleased with my first attempt at weaving a bag and it's already being put to good use.


Here it is holding 100 short lengths of yarn, waiting to be woven into the next bag. This time I'm only using the little two inch loom. The bag is going to be bigger than the first one and I'm going to give it sides and a bottom as well as a back and front. The plan is to weave a chequerboard of twenty mixed bright colours and four neutrals. Too much random makes my head hurt so I've planned the colour order in advance, hence the shade card.

Here's my progress so far.


Once I've finished that second row (and darned in the ends), that will be the first of the sides done. Darning in all the tails is easier than you might think as the woven join gives a dense line to hide them in.

I would have made more progress if I hadn't decided to write up a photo tutorial on the joining as I went along. All I can say is that it's already thirteen pages long and has over forty photos! Still, there's no danger of me not remembering how to do it now. I'd be happy to share my notes when they're finished if anyone's interested. 

Progress should be quicker now I don't have to stop several times a square to take photos. This is one of those techniques that looks much more complicated written down than it is to actually do. It's based on simple rules and, once you've got the hang of it, the weaving (and joining) goes pretty quickly. I'm glad to have added it to my not very extensive weaving repertoire.

I rather like the look of the wrong side of the joined fabric too. 


Thursday, 24 July 2025

Hollyhocks

Nearly all the flowers in my garden this year are shorter than normal. I've had dwarf foxgloves, mini love-in-the-mist and pint sized lupins. Because of this, I was dubious that the little hollyhock plants I planted in the Spring would come to much. I needn't have worried.


The flowers are coming out in ones and twos rather than in a mass but still ... I'm pleased with them. I've got five all together, these two near the house and three more up the garden. They're all doubles and four of the five are pale pink with just one deep pink.


I'm hoping they'll self seed and be back next year.; I have no idea which type these are so we shall have to wait and see. I've always loved hollyhocks but this is the first year I've really managed to grow them. I'd like some single ones too and ore colours but you have to take what they have from the plant stall in the market which is the only place I can get to for plants. It's and excellent stall though and it's quite fun just seeing what's there.

My Mum always had a lovely display of hollyhocks; this photo is from about sixteen years ago.


You can just see her runner beans up at the back. There may only have been two of them in the house but she still had a full row of plants. She loved her fresh runner beans. I find that three or four plants on a wigwam of sticks gives me more than I need.

Inspired by the flowers in my garden I thought I'd have a look round the house for other hollyhock prettiness and found all sorts of treasures. This is one of my favourite cup and saucer sets. Isn't it lovely?


And I love this teapot, complete with cup, saucer and tea plate. I used this set for my tea the other day.


I have a whole cupboard full of pretty china and, every so often, I swap it round and choose a few sets to go on my kitchen dresser for everyday use.

Cottages with pretty gardens which nearly always featured hollyhocks were very popular themes in china and embroidery from the 1930s and are back in fashion again now. Or maybe they're not and I just think that because I like them so much. 

Over the years I've found various embroidered pictures in antique shops. This one hangs in my front room ...


... and I've written about this little one before. You can read about it here. It just took me ages to find the blog post I wanted to link to. This is what comes of being lazy labelling the posts when I write them. You should be able to click on any work in the word map at the side to find posts on that subject but I'd forgotten to list that particular post under 'embroidery'. Oh dear.


Anyway, if you read that old post, you'll learn that this particular embroidery came from a 'Good Needlework' magazine from November 1937.


I have lots and lots of old needlework magazines like this. Often, hollyhocks were combined with the ubiquitous crinoline lady as in this design from the 'Good Needlework Gift Book' of 1936.


This is an early catalogue of Weldon's embroidery transfers. Note the hollyhock tea cosy in pride of place on the cover.


I've shown you this lovely embroidered firescreen before too and, four years on, I still haven't managed to re-lace it and mount it properly.


I found a couple of other crinoline ladies to show you in my trawl round the house. This is actually a handkerchief sachet but I've put a piece of plastic canvas inside it and it's been propped up in  my kitchen for years (it could probably do with a wash).


Then there's this bag which I made from one of my many charity shop finds.  This is hung up in my craft room and holds my embroidery hoops.


Lorna Bateman is partial to embroidered flowers and crinoline ladies too. Her work is absolutely beautiful and I would recommend her book Embroidered Country Gardens.


As well as lots of detailed projects, she has instructions for embroidering all sorts of garden flowers and features so that you can design your own garden picture.


I have to admit that I haven't made anything from this wonderful book yet but I will - one day. That reminded me of these two tablecloth kits that I bought about thirty years ago when I found them very cheap.


I think they're both beautiful but - you've guessed - I haven't actually made either of them yet. I did make a start on one years ago ...


Mmm, quite a bit more to go I think.

The nearest I've come to knitting hollyhocks are these on the side wall of my Summer Cottage.


I have just published a pattern for some crochet flowers though. 

Crochet Bouquet

Having crocheted lots and lots of these flowers I thought I'd just try making mini versions and these turned out to be favourites.


I had fun choosing colours to match the threads on my old cotton reels. These are now sitting on my desk and they make me smile every time I see them.

Before I go, I just wanted to show you the woven blanket I finished the other week. This is the pin loom one I was working on with the help of my improvised Lego loom holder. I crocheted the squares together with a lacy join, added a simple crochet border and it's all done. It took less than a month to make from start to finish. That's a lot quicker than knitting or crocheting a blanket. 


Wednesday, 9 July 2025

Hexagons

It all started with an urge to do some paper piecing. Every so often I feel the need to sew little hexagons together and make something pretty like these cases that I use to hold mini cross stitch projects.


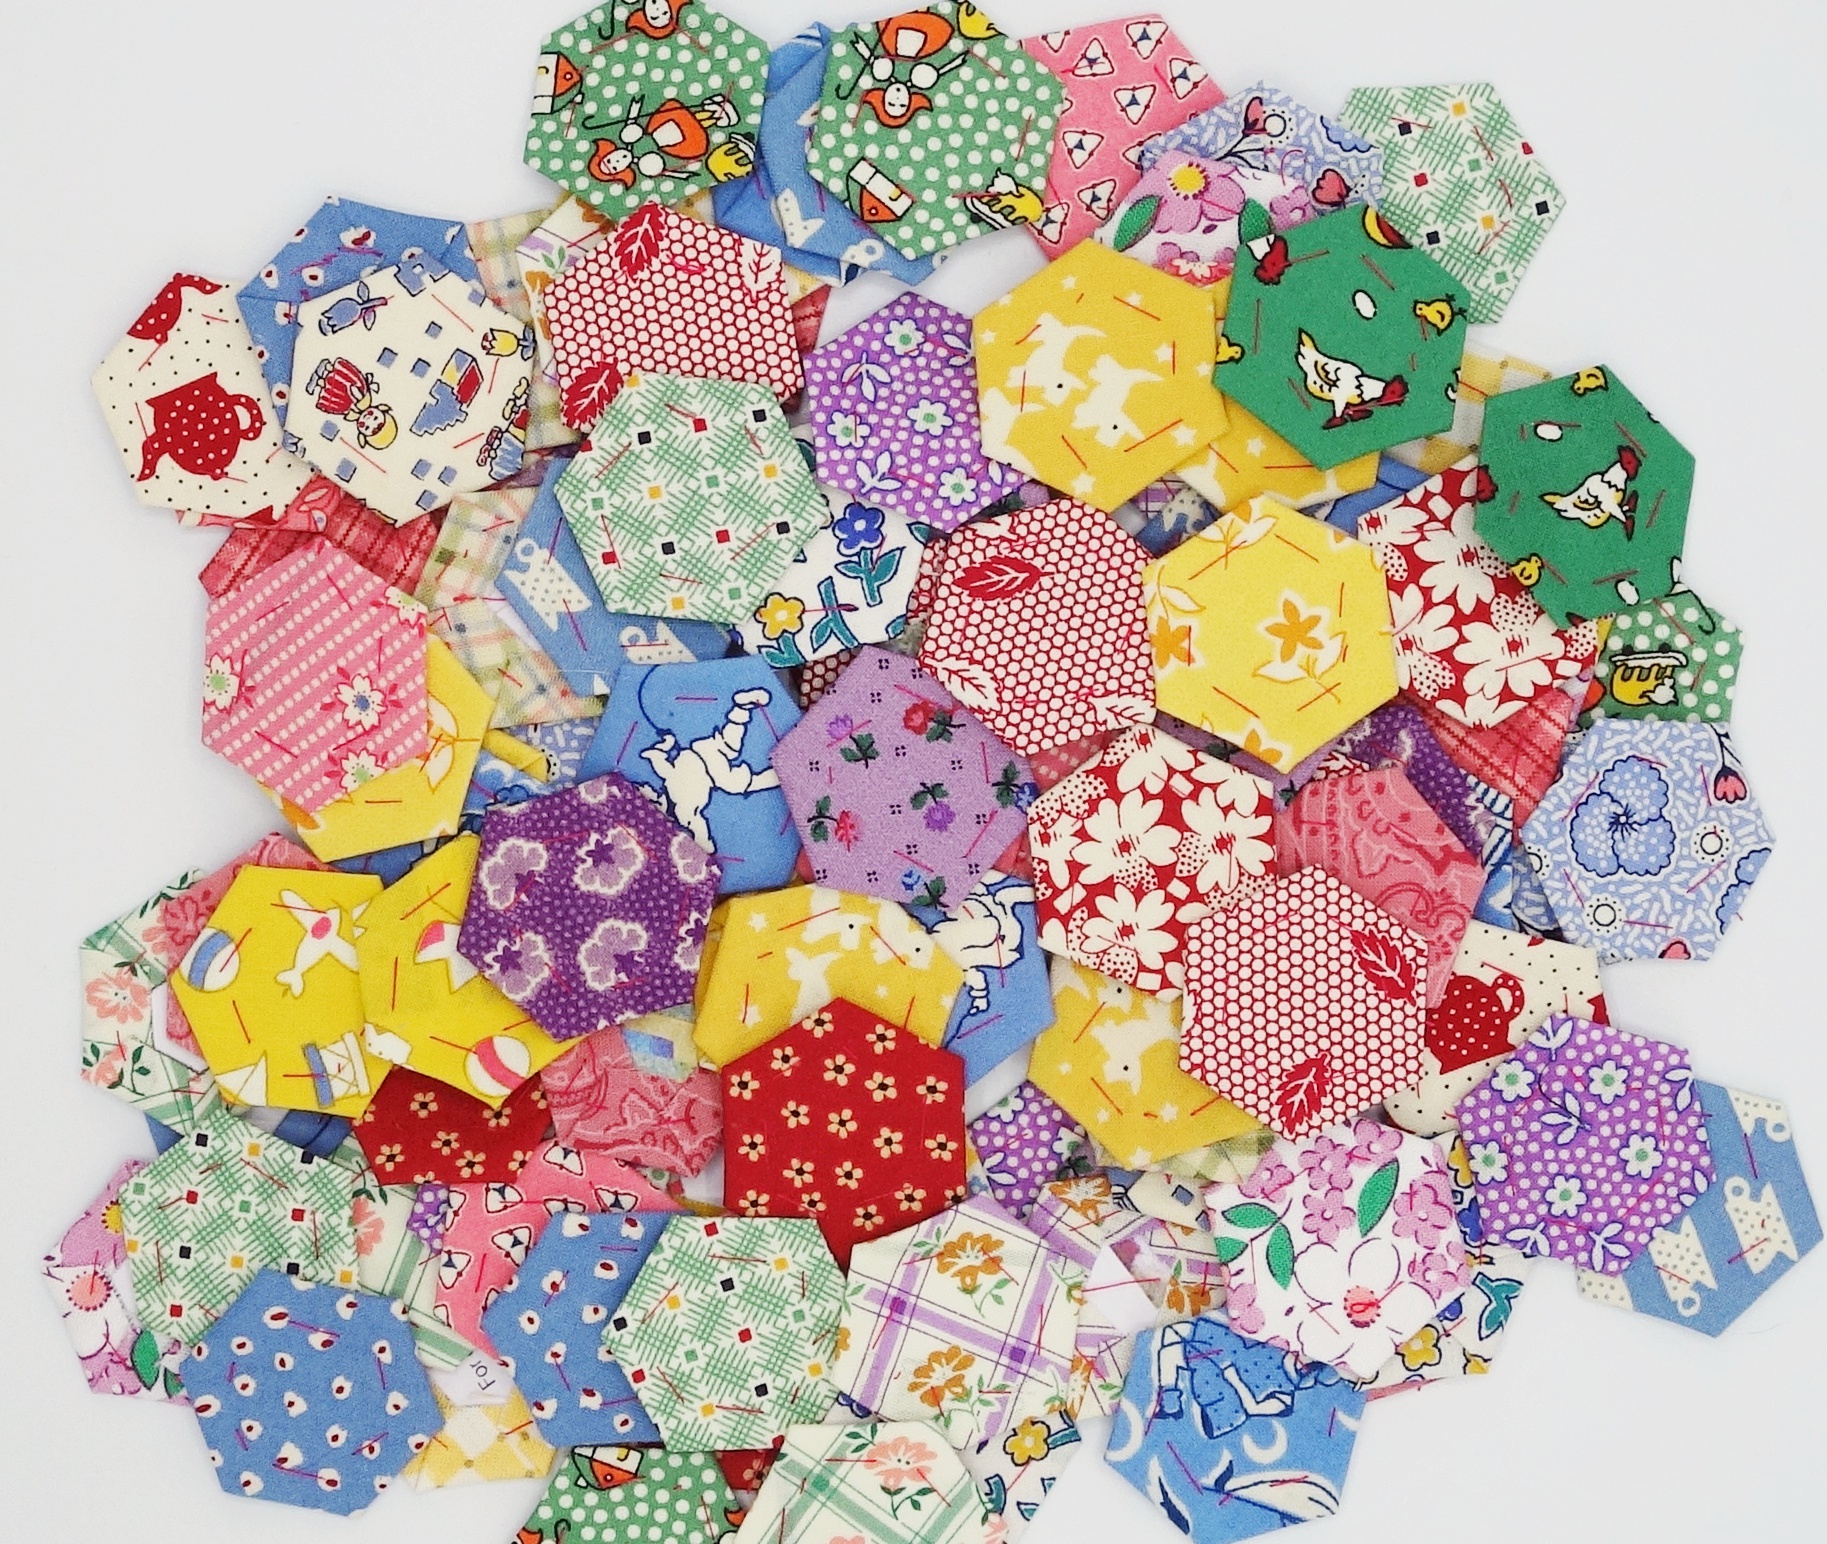
I particularly like working with these mini hexagons where each side measures about 2 cm. It's fairly mindless hand sewing and that appeals to me; I like the slow rhythm of it all. So, I cut out lots of paper hexagons (quickly, using my Sizzix machine) and lots of fabric hexagons to cover them (slowly, by hand). I don't have a die of the right size to cut the fabric hexagons on the machine but I quite enjoyed choosing the fabrics and drawing round a template.


I used a selection of thirties fabrics, all of which I pulled out of my scrap baskets. I wasn't counting but I ended up with well over a hundred hexagons. Here they are once I'd tacked them over their papers.


It will take me a while to sew them all together but I've made a start.


I'm thinking of perhaps making a drawstring bag with them, possibly with a plain band where the drawstring goes but I shall have to see how big a piece of fabric I end up with. At the moment I'm just enjoying seeing them come together.

This project reminded me of something else I started years ago, this time involving tiny woven hexagons.


When I first got my Penny Loom I made a bit of a start on a Grandmother's Flower Garden but didn't get very far. I decided it was time to bring it out again and look how it's grown in the last week or so.


These hexagons are even smaller than the fabric ones; each side is only about 1.5 cm. The fun thing about this project (or frustrating, depending on your mindset) is that I've decided to weave the whole thing with one shade of King Cole Bramble DK, namely Loganberry. This means I weave the colours as they come and can only put together the flowers when I have six hexagons in one colour. At one point I did nothing but weave shades of green and I still haven't got enough yet to surround each new flower.


Now I'm back to building flowers. I shall need twice as many for the next round, not to mention more greens.


That little bundle at the top left of the photo is the hexagons that are either mixed colours or a colour I don't want to use (basically, the light brown). Maybe when I'm finished I'll have enough of these to turn into a pincushion or something. I'm hoping my flower garden will eventually be big enough to cover a small round table I have.

Of course these hexagon looms come in different sizes so I was tempted to get out my bigger one too. Hexagons woven on this one come out at about 5.5 cm per side.


Having wanted single colour shapes with my flower garden I thought I'd see how the yarn wove up on the bigger loom. Before I knew where I was, I had a whole new project started.


This one is all about random colours. The plan is to weave twenty hexagons out of each of the twenty shades of Bramble - I'm nothing if not ambitious - and then sew them all together into a patchwork blanket. I've started with the shade called Cloudberry and this is what the first fifteen look like.


Aren't they gorgeous? I love the process of weaving and seeing how the colours develop. This is my favourite yarn for weaving - actually, it's one of my favourite yarns full stop. I've knitted and crocheted with it quite a bit but the colours do different things when you weave them, Will I actually weave 400 of these? I don't know but I shall enjoy trying.

I haven't forgotten my woven squares I showed you last time either. I'm crocheting them together at the rate of one row per day, using a lacy join. I've just got the last row to add today and then I shall work out a border for it. The shade I used for this one is Thistle. 


Is any one else as big a fan of this yarn as I am? And no, they haven't paid me to promote it, it's an honest opinion. I'm very pleased when they bring out new shades (as they have just done) as it shows it must be popular and isn't in danger of being discontinued. 

Before I go, I thought you might like to see one more new project. This one is also lots of little shapes but this time the shapes in question are circles.


Can you see what they are? A knitted version of the popular fabric Yo-Yos. These are fun to sew; you can buy special Yo-Yo Makers but they're really just circles of fabric gathered round the edges. There are some lovely designs out there for crochet yo-yos, either single, flat ones or doubled puffs that are a closer match to the originals.

I also found a pattern for Loom Knit Yo-Yos which looked just what I wanted but there was a problem. They start with a drawstring cast on which is easy on a loom but with needles? I think you might be able to do it with some variation of the provisional cast on but, as I've never mastered that, I can't say. Instead I decided to re-invent the wheel so to speak and worked out my own drawstring cast on. Needless to say, it took hours and I kept having to stop to make copious notes on what I was doing before I forgot it. The result though is perfect knitted yo-yos.


As you can see, I've only knitted half a dozen so far but I have lots of plans for using these. Please tell me I'm not the only one who thinks being able to knit yo-yos is exciting!