
I've just finished one such pattern, Stacking Stars and I feel the need to show it to anybody and everybody so here it is.

These are very simple, garter stitch stars which come in nine sizes and can be stacked together to make a rainbow tree. I think this is such a typical Frankie pattern in many ways.
First of all, it started with the colours. I love any excuse to play about with lots of bright colours and, since I made my Colour Pegs of Stylecraft Special DK, this has been much easier to do. For this pattern, I had in mind a range of brightly coloured stars in all different sizes so I got my colour pegs out to choose my colours. I thought nine would be enough so I put together two sets of colours, one bright and the other a bit more muted.
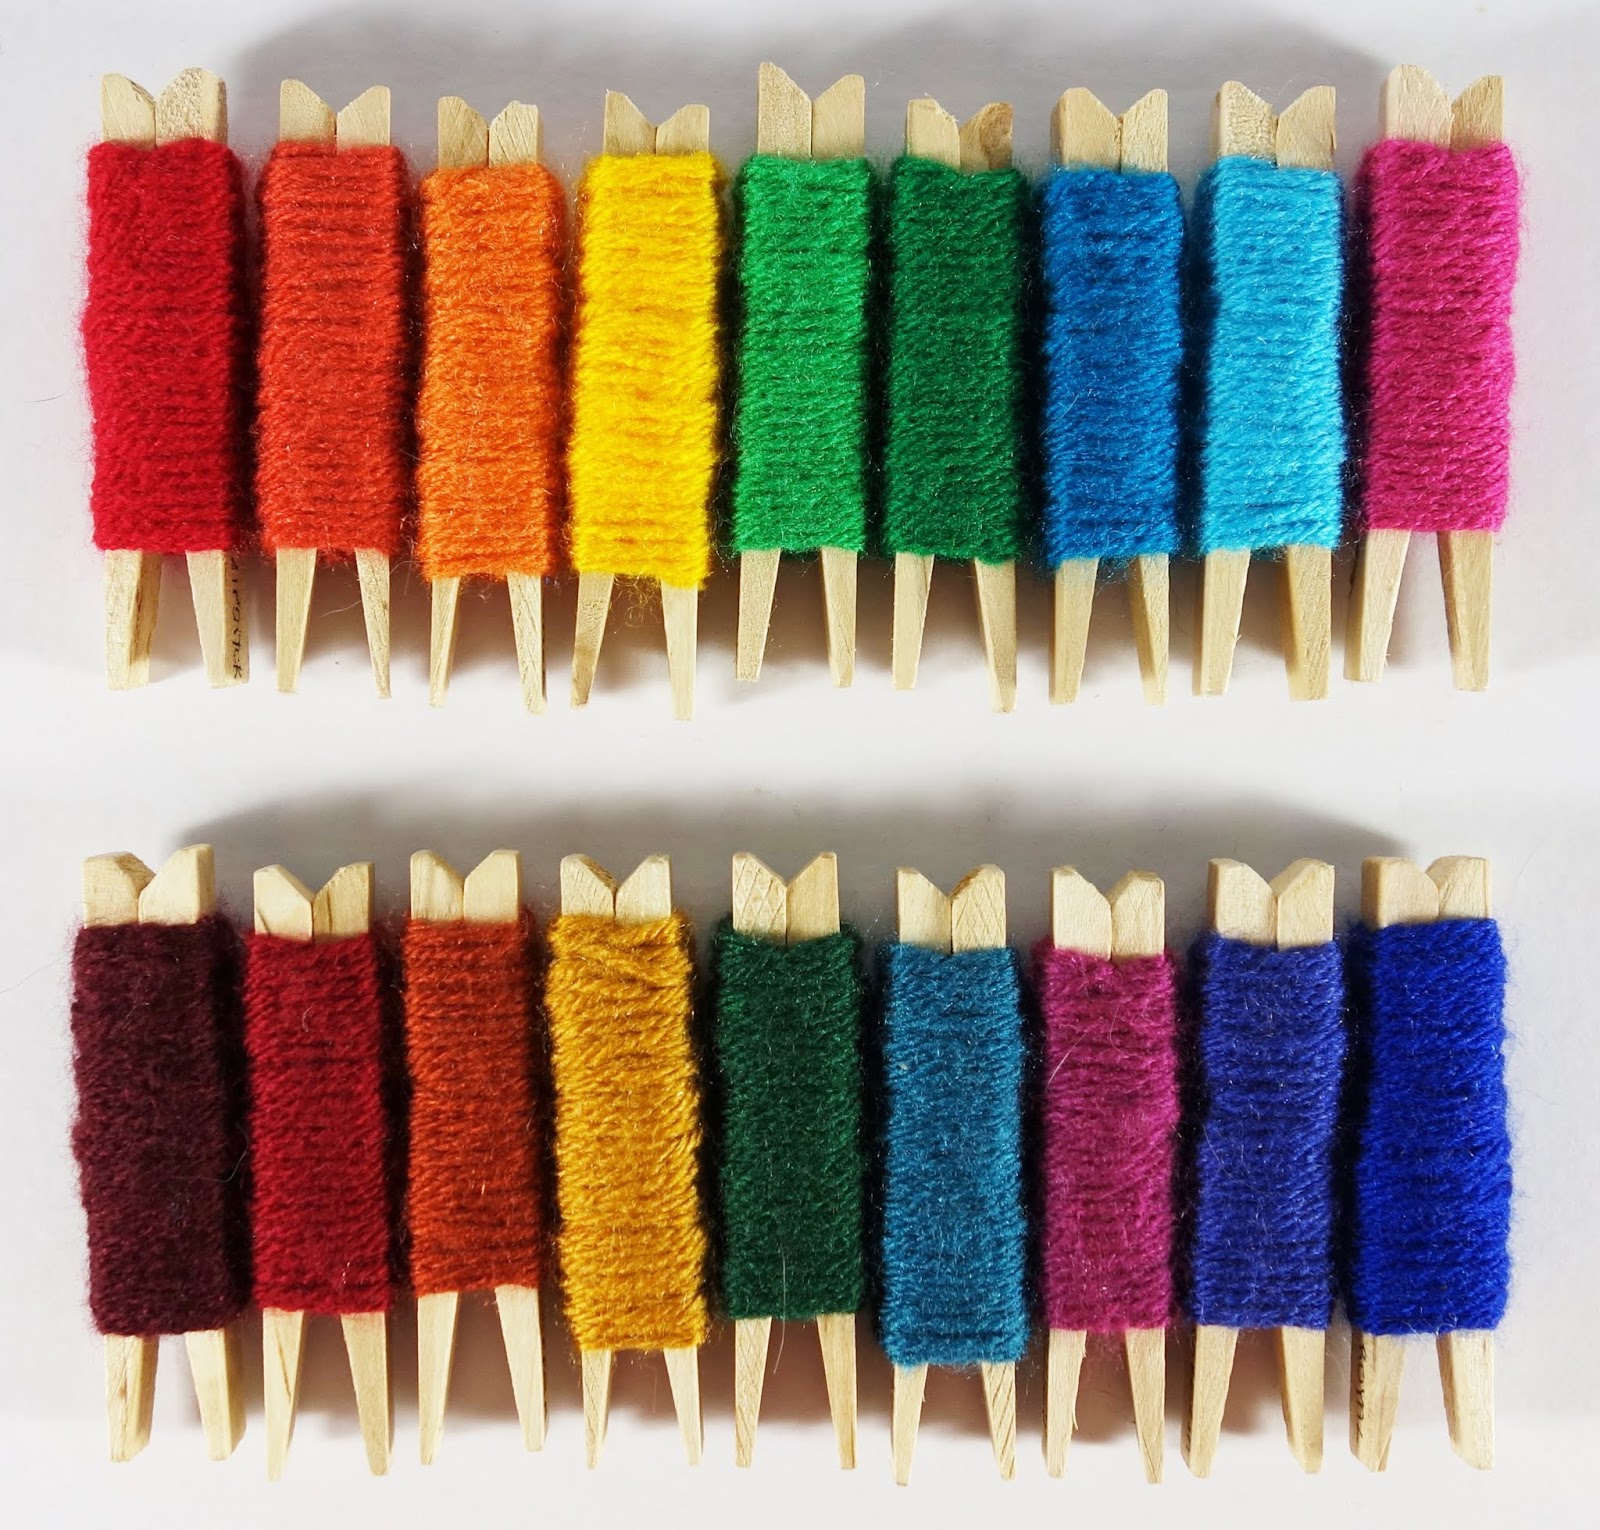
Then, on the grounds that you can never have too many colours, I re-arranged them into a sequence so that I could use both sets.

When I'm arranging colours like this, I very often put them in rainbow order - Richard Of York Gave Battle In Vain (that was fun; I may have to write in colour more often). I love the way Stylecraft Special is labelled by name rather than colour; my chosen colours are, from left to right:
Burgundy, Claret, Lipstick, Copper, Gold, Sunshine, Kelly Green (one of my favourites), Green, Bottle, Petrol, Empire, Turquoise, Fuchsia Pink, Boysenberry, Lobelia and Royal. I work with this yarn so often that I'm starting to learn the names off by heart; it's almost like they're my friends ... Oh dear.
Anyway, after choosing my colours I had to work out how to knit the stars. This is where I decided to go back to one of my old patterns, Advent Stars.

I designed these a couple of years ago to use up yarn left over from my Opal Advent Calendar, after knitting my Patchwork Pelerine. I understand Opal aren't producing a yarn advent calendar this year which is probably just as well for me as I still haven't finished the project I started with the 2016 calendar.
So, I took the basic pattern I'd used for the Advent Stars and then worked out how to knit different sizes. This turned out to be really easy, it was just a case of adjusting the number of pattern repeats to suit the number of stitches cast on. This is why I love garter stitch, it makes designing so easy. Right, I thought, knit nine sizes of stars, starting with 4, 5, 6, 7, 8, 9, 10, 11 and 12 stitches. That shouldn't take long.
This is where I hit another typical feature of my patterns. They might be colourful and very simple to knit but it takes a surprisingly long time to knit enough of any given pattern to be able to produce a pretty picture. Turns out it takes a very long time to knit 18 stars (plus one for the top of the tree). It didn't help that each star is actually two star shapes sewn together. This makes the shapes more regular as well as giving them a bit of body. So, many days later, I ended up with this ...

At this point I got distracted by arranging the stars into pretty patterns. This happens to me a lot when I'm working with lots of colours. There was a lot of this ...

Eventually I decided it was about time I turned turn the stars into something. I'd had the idea of a tree in mind from very early on but I couldn't decide how to arrange the stars. Should I stack them so that all the edges matched like this ...

... or offset the points to make more of a rosette shape ...

... or perhaps something more gradual, like this swirl ...

In the end I decided on the first option and set about sewing the stars together through their centres. This was very quick and easy, although I realised half way through that I needed to use the colour of the topmost star, not the bottom one as that would be the one that showed.
And guess what I found out once I'd finished? I could still twist the stars once they were joined which meant I could have all three shapes.

I'd left the star for the top of the tree until last, planning to sew it down through the two bottom points but then I had a better idea. If I pinned the star to the tree, I could take it off to store the tree, lay it flat on top and pin it down again. That way, it was less likely to get battered when I put it away.

I used one of my T shaped blocking pins for this which is just the right length for the job.
At this point you'd think I would have finished the actual knitting, wouldn't you? But no, another thing I do a lot is think "what else could you use this pattern for?". I managed to talk myself down from knitting some star bunting but I did get distracted by a tree decoration ...

... and a tiny tree with stuffed stars and silver beads for decorations ...

This one's only about 5 cm or 2" tall and I have to admit that it was a bit fiddly to knit.
So, there you have it, a typical Frankie pattern - lots of colours, simple pattern (but taking ages to knit) and several uses for it. One more thing that strikes me is that it's yet another geometric pattern. I think playing with shapes comes a close second to playing with colour.
 |
| Rainbow, Accidental Toy, Play Beads and Honeycomb Bauble |
See what I mean? Click on the links below the picture for more details on these four patterns. There are lots of geometrics in my blanket patterns too but I think I've wittered on enough for today. Time to get on with some of those unfinished designs I think.
Oh, sooooo nice! Thank you!
ReplyDeleteYou're welcome, I do like a colourful project.
ReplyDeleteI have seen the idea of using a long knitting needle as a center post for a tabletop Christmas tree decoration, where you use glass ornament balls of progressively smaller diameters, sliding their hanging loops over the tip of the needle, and putting the topper ball over the top of the needle. That technique might work well with your knitted star tree, too.
ReplyDeleteYes, it would, wouldn't it? The main problem is making the needles stand up. I did that with my Needle Tree Christmas pattern a couple of years ago by 'planting' the needle in a pot of self-hardening clay.
ReplyDelete