Monday, 27 November 2023

Another Embroidery and some Festive Patterns

After writing about my Mum's embroidery last time, I remembered another picture from the 1950s to show you. I found this one in an antique shop and, as you can see, it commemorates the Festival of Britain of 1951. 


It's an interesting design. On the left are pictures representing 1851 when the Great Exhibition was held, the modern equivalents are on the right. Of course, things that would have seemed very modern in 1951 now look dated to modern eyes.

Near the top right is Battersea Power Station which was certainly a great advance on the windmill. I remember the power station still working but now Battersea is a shopping centre. I also like the horses ploughing on the left and what is now a very old tractor to the right. My Dad was a tractor driver in the 1950s and 60s;  I remember watching the harvest and thinking how nice it was they'd put his name on his tractor ... how was I to know that 'David Brown' was also a make of tractor?

The embroidery is a bit stained and has been damp at some point. I must clean it and find it a frame; it deserves to be on display.

I also wanted to tell you about a couple of Christmas patterns that I've managed to finish recently. The first one is a crochet version of paper chains where each chain buttons on to the next so that the colours can be swapped round. I've put this together as an advent calendar for myself and thought others might like to make one too.


I wound 24 little balls of yarn, each with a matching button in the middle and wrapped them all in tissue paper. Then I added numbered tags so that I can make one chain a day during advent. If you'd like the pattern, it's available free on ravelry - Advent Chain. There aren't any photos of the finished chain as I've only made one so far to work out the pattern. I'll show you how it's coming along next month.

As you can see, I also crocheted a drawstring bag to hold all those balls of yarn. Needless to say, this was much more complicated than the chains and took a while to make. I learnt how to crochet a nice cord though so that was fun. I think my favourite bit of this bag is probably the little crocheted snowballs on the ends of the cords. The pattern for the bag is published separately and would make a nice gift or project bag if you don't happen to have 24 tiny balls of yarn in need of a home.

Advent Chain Bag

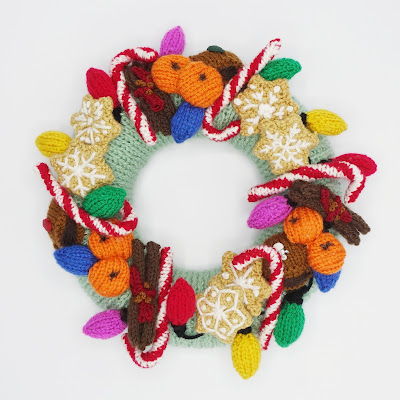
My other festive pattern is yet another wreath. I think this might be the fifth one I've designed and it's the smallest of the lot, being only about 20 cm / 8" wide. Despite that, it took me more than two years to design this one, my Long Covid kept getting in the way. So it's a great relief to have finally finished it.


The decorations on Christmas Cheer are all inspired by festive food and drink. Well, apart from the fairy lights. I needed something to fill in the background and they added some colour to the design. The pattern for covering the wreath is available now; the six sets of decorations will be published on alternate days, starting on 1st December with those fairy lights. If I can get them written, there will also be a short blog post to accompany each pattern, talking about my inspiration for each of them.

There's not much progress to report on my new bedroom as I'm now waiting for my bed and mattress to be made. They should be ready in a few weeks so I'm hoping to move in before Christmas. In the meantime, I've finished re-vamping the floor and have moved my desk and chair back in.


It's actually my daughter's desk (an old double school desk I bought her years ago) but she says I can keep it for the time being. I also found some tiebacks for my new curtains. Did you know you can get magnetic ones now? Well, I didn't. What a clever idea.

The other thing I've done is to work on the bedroom door which was chipped, dirty and battered from years of furniture moving and general living. Doesn't it look nice now?


Would you believe, all I did was fill in the chips with a dark wood stain felt pen and then give it a polish with a dark beeswax? A bit of Brasso on the door knob and it looks beautiful. I'm very pleased with my 'new' door.

Saturday, 18 November 2023

1950s Embroidery

I recently shared this embroidered picture worked by my Mum on my ravelry group and I thought it would be nice to have a look at some other embroidery from the 1950s.


I think this dates from the 1950s when Mum was a young woman, although I haven't been able to track down the original pattern yet. I particularly like the little cat and the dog and the fact that it's two women. Somehow, it makes me think of the house we lived in when I was very small which had a steep hill behind it.

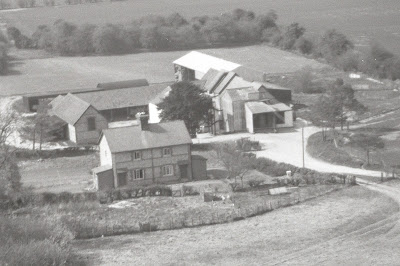
Charity Down Farm

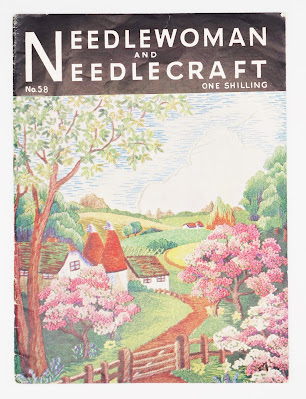
One of the needlework magazines of the time which often featured beautiful embroidered pictures was 'Needlewoman and Needlecraft' which was published for many years.


There would be a free transfer for some simple motifs but, for the bigger items, you had to order the transfers. The earliest issue I have is number 2 from April 1941 (it was a quarterly magazine).


This copy (found in an antique shop) still has the original list of people in the road to whom it was lent. Miss Beech had it first and then it was to passed on to eleven other friends and neighbours, changing hands every two or three days until finally returning to Miss Beech who kept it.


I remember my Granny doing this with her neighbours. When money was tight, this was a good way of getting to read different magazines. As well as needlework, the magazine also had knitting and crochet patterns, as well as tatting sometimes. In this early issue, I'm rather taken by the embroidered knitting on this little jumper.


The pages of the magazines were mostly black and whit but there is another colour spread in the middle of this one.


Although it's applique, that house picture is in a similar style to the one Mum embroidered. I do have one piece of early applique that she did but, again, I don't know where the pattern came from.


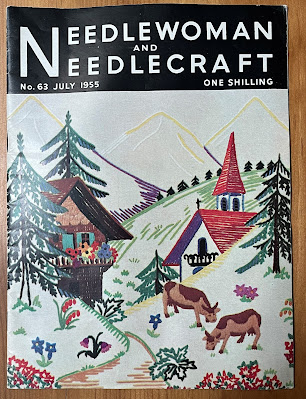
This alpine scene, worked in wools, needs a bit of a repair as moths have got to some of the colours.


I gave this one to my daughter, along with a copy of the original pattern and the necessary colours of tapestry yarn so that she can either fill in the gaps or work a new one. This was the cover project on 'Needlewoman and Needlecraft' in July 1955.


This next magazine, from April 1954,  has another beautiful picture on the cover.


I love this collection of embroidered flowers, one of the transfers that could be ordered through the magazine; this one would have cost you 7d (that's just over half a shilling in old money or about 3p in new).


The magazine also carried adverts for companies which would supply pre-printed fabric or kits for the designs too. Flowers were a very popular subject for embroidery. I have several pieces worked by my Mum, including this pretty little cloth.

All of these embroideries could do with a wash and press ...

This one is especially nice and I wish I could find the original pattern. I wonder what it was intended for?


I would like to use this one in some way but haven't worked out how yet. It's made up of little squares, embroidered together. I wonder if Mum bought the marked squares as a set?


The style of these strikes me as a sort of modern Jacobean embroidery as do these flowers from the same magazine.


There are more nice patterns in this particular magazine. I like the stitch pattern on this jumper - pictured on yet another impossibly thin model. Mind you, the wartime rationing was still in force well into the 1950s.


And who remembers these belts? When they came back into fashion in the 1970s I wore the one that Mum had worn twenty years earlier. Sadly, it wasn't a crocheted one though.


This is the most exciting set of patterns for me though. Tiny embroideries to be made into brooches. You could order the brooch frames as well as the transfers through the magazine.


I have a small collection of these, several of which were embroidered by Mum. Hers are the three on the left.

I should like to collect more of these; aren't they pretty?

I have one more finished embroidery of Mum's and it's a big Willow pattern one, measuring about 45 cm / 18" across.


I know that this one was from a copy of 'Woman's Own' magazine but I don't know the date. I think it would look good framed under glass or plastic as a small table top.

I hope you've enjoyed this browse through 1950s embroidery. I'd love to hear of any old family embroideries that you have or can remember.

Monday, 13 November 2023

A New Quilt and a New Bedroom

First of all, the new quilt doesn't go in the new bedroom. Actually, the new bedroom doesn't even have a bed but more of that later.

As regular readers will know, my son moved into his new house earlier this year and I decided to make him a quilt to mark the occasion. He asked for one to go on the coffee table which he inherited from his Grandma which sounded like a good idea. Now this is quite a substantial coffee table - about 4' x 6' - and I normally only make small quilts but I didn't let that put me off. 

The planning was easy. I decided to make a rail fence quilt using lots of different colours and, in February, I sewed the first trial block.


Simple to cut and easy to sew. I worked out that I needed 84 blocks all together so I set about cutting and piecing them, one colour group at a time. By March I had all the blocks done and pieced together - so far, so good.


There was a bit of a delay while I hunted through my large stock of fabric for something big enough for the wide border ... and then I had to hunt again for some fabric for a narrow, inner border.


I was a bit apprehensive about pinning such a big quilt but had a breakthrough when I thought of Mum hanging her big quilts from the bannisters to pin them. I didn't fancy doing that but it did give me the idea of putting my big square table in the middle of the room and letting the quilt hang from the sides of that. This worked a treat and gravity helped smooth out the creases.


I worked out a simple quilting pattern made up of lines, curves and circles and set to work. You may or may not be able to make it out in this picture ...


I think it's a bit clearer on the back. You can see how the lines come together to create circles (sort of).


I really like watching the quilting appear; it's like the back stitch on a cross stitch picture, it turns a flat design into something with depth and texture. There is one slight drawback though - hand quilting takes a long time. And when you're making a big quilt, it takes a very long time.

So  ... I quilted through the Spring and then had a few weeks break to make this quilt for a friend's birthday. This is only a mini quilt, the sort of thing I normally make. The pictures are some of her old family photos.


Then it was back to quilting the big quilt. I quilted through the Summer and on into Autumn. By September I'd moved on to quilting that big border and I finished it on the 1st October.


Then there was just the little matter of binding the quilt. Little? I'd decided to piece a scrappy binding which was just as well because I ended up needing six metres of it. I machine sew my bindings on to quilts and then hand stitch them down on the wrong side, something I normally see as a quick task at the end but this one took days (of course it did). Finally though, eight months after cutting the first strip of fabric, it was finished.


I'm really pleased with it (and so is my son). I haven't got a photo of it on his table yet but here are a few  more taken here.


You can see the scrappy binding in this one ...


... and, of course, a quilt isn't finished until it's been labelled (something I could very rarely get my Mum to do with her quilts).


That's the quilt accounted for. Now for the new bedroom. After the huge undertaking that was my new room of requirement (craft room) last year, this year's big house project is a new bedroom for me. With a lot of help, I am turning what was my daughter's old bedroom into mine. It's on the top floor of the house, next to my craft room so I'm gradually moving upwards. I wanted to sleep at the back of the house which is quieter and also has a lovely view across all the gardens which make up a big green space.

The room has been used to store all sorts of stuff for ages, here are a few 'before' pictures.


Piles of books, old photos and more than a few empty bookcases waiting to find somewhere to live. There's also a pile of my daughter's stuff waiting for her to move somewhere where she has room for it. 


More books, boxes and a spare bed. Do you see the dolls house with the red roof? My Mum and Dad gave me that for my seventh birthday, I re-furnished it and gave it to my daughter when she was four and now she's given it back to me (now that I've reached the age of nostalgia). I'm hoping to find room for it in my new bedroom and to bring it back to life. I've still got a few of the original furnishings back from when it was new.

As you can imagine, it took us quite a while to empty the room (and yes, all the other rooms are a bit fuller now). Mind you, another huge pile of bags for the charity shops went out of the house, at some point the house must surely look a bit emptier?

The first thing to do was the painting. I wanted to keep the original colours (yellow walls and dark pink woodwork) but it was all it a bit tatty and grubby so I gave it another couple of coats of paint. This was hard going, even though I only did one coat on one wall per day but I got it done in the end.

When I'd finished the walls, my daughter came for the weekend and painted the ceiling for me and, between us, we trimmed some of the old shelves I put up years ago so that they fitted a bit better.


The other thing we got done that weekend was to finish the new curtains for the room. I was fine at doing the sewing - again, a couple of seams a day - but my Long Covid brain can't cope with calculations so I didn't trust  myself when it came to all that measuring and cutting. My son helped me measure and cut the fabric so that the pattern matched and then my daughter helped me with the hemming. 


It's times like this when an old house shows its true colours. Big windows and uneven floors mean that you can't just hem both curtains to the same length; one has to be a bit longer than the other so that they're level with the floor. I chose a lovely, old-fashioned rose fabric for my new curtains. After the modern look of the room of requirement, this one is going to be pure 1960s Hampshire (told you I was nostalgic).


Over this last week I've been re-varnishing the floor (and my hands) so that looks nice and new too. The next thing to do is to order my new bed (the old one is staying in the old bedroom as a spare bed). Unfortunately, choosing the bed involves numbers again so I'm having help with this too. I've decided to get a small double which is 4' rather than 4'6" wide to take up less space but can't decide on which length to get. I've found a company who make custom sizes (including mattresses to fit) so I'm thinking of a slightly shorter bed too but don't know yet whether I'm going to get a 6' or a 5'9" - decisions, decisions.

I'm hoping to have the bed, my chest of drawers and my clothes rail (I don't think I've ever owned a wardrobe) in place by Christmas so that I can move up there. Then I can see what room I've got left up there for other pretty things ...