I think Spring Finishing is a much better idea than Spring Cleaning. Actually, I've been doing some of that too but didn't think you'd appreciate photos of my scruffy house (and that's after the cleaning).
My first finish is the Tunisian Crochet scarf I told you about a few weeks ago. This was from the pattern in the book Tunisian Crochet Workshop and it was a fun, quick project. Here it is being modelled by the ever patient Mr Bennet.
What do you mean, you don't have a life size cuddly sheep in your house? What do you do when you want to photograph a scarf or shawl then? My sheep is named after Mr Bennet in Pride and Prejudice whose patience is also sorely tried.
I was going to add pompoms to the ends of the scarf but, in the end, just sewed on some bright coloured buttons instead. Which reminds me, I've started my own button Charmstring. Victorian ladies used to collect buttons on a string like this; they all had to be different and the buttons had to be given, not bought. The idea was to collect 999 buttons, at which point the love of your life would appear and give you button number 1,000.
I've got about a dozen buttons so far so I've got quite a way to go. As you can see, these are all metal buttons; I'm tempted to start another one with bright coloured plastics. It's probably as well to hedge your bets; it would be a bit sad if Prince Charming turned up with the wrong sort of button and I had to send him away.
I've also finished the crochet blanket that I started making out of some old Noro crochet squares I found in a box. I crocheted round each one, crocheted them together and then added a border. The border took a while as I kept thinking "just one more round". Anyway, it's been washed, blocked (and had the cat hairs it acquired during blocking removed) and I'm pleased with it.
I've been putting up a few decorations for Easter too, well ... the odd bunny anyway.
I'll put vases of daffodils everywhere tomorrow and then it will look more Spring - like. I do like my Springtime Wreath. You don't need much else when you've got one of these to hang up.
See that mottled effect in the top right corner of the picture? That's what you get when the sun shines through old, Victorian wobbly glass.
With Easter in mind, I knitted up some little flower brooches the other day. I've got a small collection of old china posy brooches and my knitted flowers match them nicely.
You can get the free pattern for my Spring Posies from ravelry as normal. They can be made as normal brooches or you can use a paper clip to turn them into buttonholes.
I think I'll go and do some quality control on those little chocolate eggs I bought now ...
Back in October 2015 my daughter gave me a very exciting birthday present - a yarn advent calendar.
There were 24 doors to open and behind each was a mini ball of Opal sock yarn. Each one weighed about 15 g and they all had suitably festive tiny ball bands.
I really enjoyed finding the new yarn each day and knitted one square with each colour during advent.
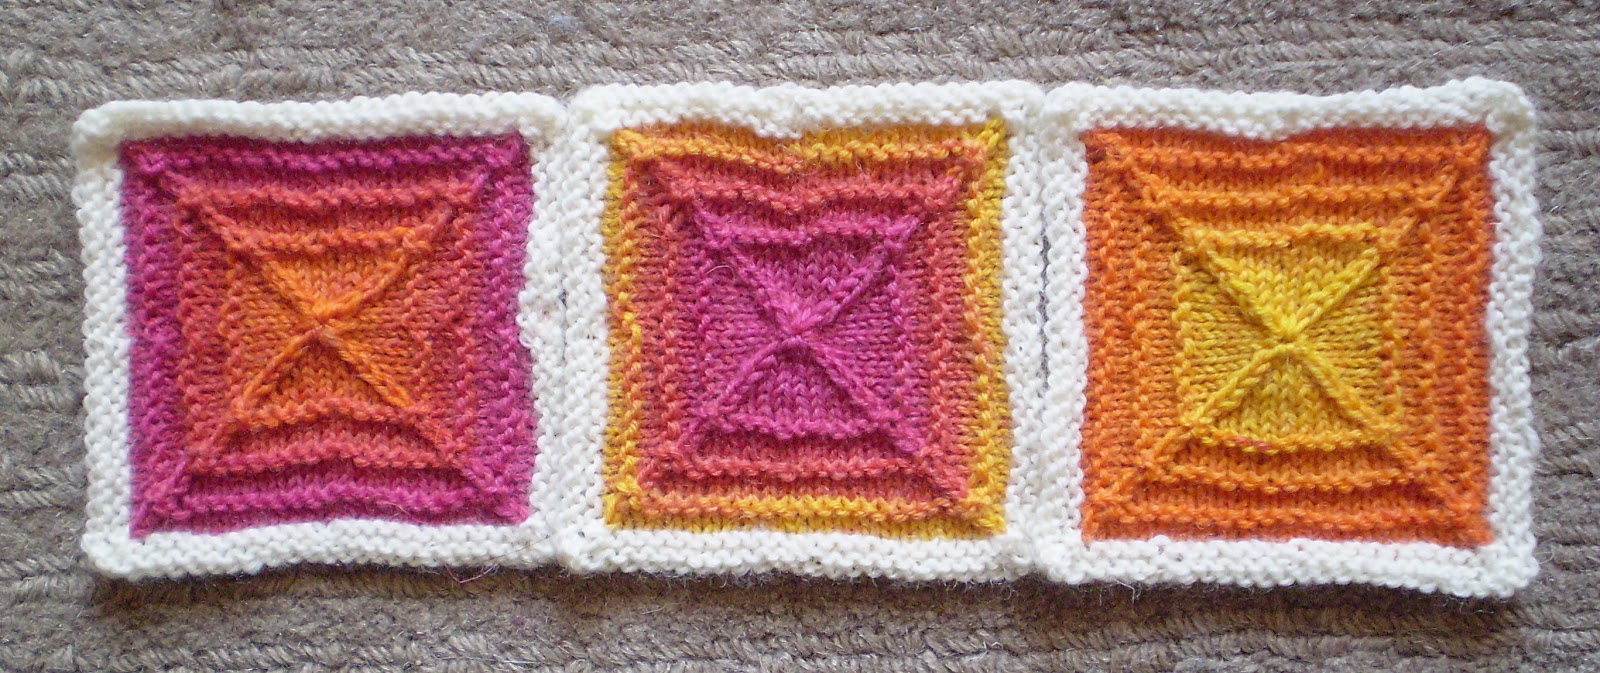
Then, in the New Year, I knitted two more squares from each little ball. The three above all came from one colourway. As you can see, I added some plain cream yarn to break up all that colour (as well as making the yarn go further). And this is what I turned all those little squares into ...
This is my Patchwork Pelerine, a cross between a shawl and a poncho. It buttons up down the front and has a straight hem on one side and a pointed one on the other. This is one of my favourite things to wear, I really love it.
This of course left me with about 4 or 5 g each of 24 different variegated yarns which I was determined to use up. So, later in 2016, I turned them into 24 little Advent Stars, each with their own number.
I was so pleased to have used up every scrap of yarn that I decided to repeat the whole project and treated myself to the next Opal Advent Calendar in Winter 2016.
And this is where I got stuck.
It didn't take me long to decide what to knit - folded flowers that I would turn into a quilt. So, off I went ...
So far, so good. Easy to knit and pretty on both sides. Now I knew I was going to need to add some other yarn to be able to make something big enough to justify being called a blanket. Having used cream as my contrast colour for the Pelerine, I decided to use a dark colour this time and found a nice dark grey Opal yarn.
Yes, I know they're different sizes - my tension may not always be spot on.
The plan was to alternate the coloured flowers with the grey ones ... the only problem was, when I laid the first few out, I didn't like how it looked.
Too heavy looking and the coloured flowers look a bit odd in amongst the grey. Now, having hit this problem, you might think that I'd have tried a different contrast colour or played around with the arrangement. But no, what I actually did was put the flowers away in a basket and forget about them for a year. I didn't seem to be able to get past my original plan.
Anyway, last week I got them all out again (feeling rather guilty at having neglected them for so long) and, straight away, it dawned on me that I could just space the grey flowers out a bit.
Already it looks better and there are other arrnagements I could try. Perhaps a grey flower in the centre surrounded by coloured flowers and then the occasional ring of grey? Why didn't I think of that a year ago?
So I'm now steaming ahead, knitting lots more flowers so that I can play with other ways of arranging them.
The eagle-eyed among you will spot that I've knitted just a few more of the coloured ones than the grey. In fact there are 31 coloured flowers and 9 grey ones (I had to count them three times, I was sure I'd done more than that). This is because the grey ones are boring to knit! I'm now making myself knit two grey flowers for every coloured one in an effort to even them up a bit.
Maybe I'll actually get this quilt finished and turned into a pattern this year. I wonder if Opal are planning an Advent Calendar for 2018?
This isn't the only old project I've resurrected recently. When sorting out boxes of beads the other day I came across a box full of crochet squares. Don't ask me why they were in a box with the beads, I have no idea. I remember making them with odd balls of Noro Silk Garden Lite more than ten years ago.
There were 25 squares all together and it seemed a shame to leave them in that box (also, I needed it for beading supplies) so I decided to turn them into a quick blanket. I'm crocheting round them with some Stylecraft Special DK in Parchment that I bought by mistake (please tell me that happens to you too) and then I'll crochet them together.
I'm having to resist the temptation to abandon my proper woolly work and just do these at the moment. I'm trying only to do one after I've done some proper work. This morning I spent several hours cutting and sticking bits of card to make a prototype for this year's big Christmas pattern so that definitely earned me a bit of crochet. I wonder if writing a blog post counts too?
There's something about learning how to do new things that's exciting and very satisfying. This is why I try to fit too many crafts into the time available. Recently I've been expanding my Tunisian Crochet skills with the help of a very good book by Michelle Robinson, the Australian designer behind the Poppy & Bliss blog. It's called Tunisian Crochet Workshop and it certainly lives up to its name. There's lots of helpful advice, a good selection of stitch patterns and some really nice patterns.
I'm often disappointed by the projects in craft books; they can be a bit basic. That's definitely not the case with this one. There are several scarves, yes, but they're interesting and focus on different skills. You could learn entrelac by working that beautiful rainbow project bag and there's a fantastic sampler blanket - I think it's worth buying the book just for those two projects.
So, what have I made? Well, I started off with the first project in the book, these Tassel Pouches.
These are worked in the round ... on one straight hook. I know, it doesn't sound possible, does it? Once I grasped the technique, I loved making my little purse. You work the round in sections, back and forth ... which seems to make no sense at all. The author explains it much better than I can.
I used a different weight yarn and adjusted the number of rounds but I was quite pleased with my finished purse.
It took me ages deciding how to decorate it. In the end I settled on some nice old buttons on one side and a bit of weaving on the other. That was another tip from the book - I'd never thought of adding weaving to the finished crochet. As the basic Tunisian simple stitch is square you could also use cross stitch.
Now I'm making this scarf.
This uses one ball of variegated sock yarn and teaches you how to shape your crochet and add eyelets. Michelle recommends blocking the finished scarf to open up the eyelets but I think I'll leave mine as it is; I like the ripply look.
This is mine so far. The yarn is Stylecraft Head Over Heels and the shade is called Matterhorn. I love the way the stripes are working out. The pattern tells you to increase until you've used half your yarn and then decrease - nice and simple - but I stopped at 40 stitches and then worked straight for a while. I'm ready to start the decrease section now. If I have enough yarn left over, I think I'll add some pompoms to the ends.
The other craft I've been playing with lately isn't exactly new. I've made jewellery for many years but it's been a while since I got my beads and stuff out. Anyway, I had a play with some chain, jump rings and buttons the other day and made two bracelets with matching earrings.
For the first set I used various brightly coloured plastic buttons; I think these will look nice in the summer. The second set is made with antique looking chain and rings that I bought intending to venture into Steampunk jewellery. The buttons are all old ones with shanks. I had a lovely time choosing these. It reminded me that I've been collecting special buttons, intending to make a Charmstring; I really must get started on threading them.
The third thing I've been learning recently isn't completely new either. I've had my Tenor recorder for some years but have never got very far with it because of the stretch for the fingers of my right hand. So, I've been concentrating on the Alto instead. I've found Sarah Jeffery's videos on her Team Recorder channel really helpful. She's full of energy and the videos are always entertaining as well as packed with useful information and tips. She talks about Baroque music, modern music, all the different recorders, how to breathe properly, hand position ... oh, and there's also a video on how to make a recorder out of a carrot.
Anyway, recently Sarah made a video just about the Tenor recorder, Getting Started on the Tenor Recorder and this has made me get my Tenor out again and have another go. Not that I'm easily influenced, but the fact that one of the recorders she plays in the video is the same as mine really encouraged me. Then it occurred to me that if I can stretch the fingers on my left hand for the violin as I have over the last year, then I can do the same for the recorder.
And, so far, it seems to be working. I can't say that I can suddenly get those bottom notes easily but I am improving. I think half the battle is having the confidence that you will get there eventually with practice. The music I've been playing is a collection of English Folk Tunes which is great. I particularly like the tunes from John Playford's 17th Century dance book. The ones on the pages in the picture are 'Jack's Maggot', 'Portsmouth' and 'Old Noll's Jig' - wonderful names.
In case you're wondering about the different recorders, there are many sizes ranging from the tiny Garkleins which are about 6" long to the Contrabasses which are as tall as a person. The most commonly played sizes however are the Soprano, Alto, Tenor and Bass. These are in the keys of C, F, C and F respectively, which means that any music in C written for the Soprano recorder can also be played on the Tenor. Here are my Soprano, Alto and Tenor recorders together to give you an idea of the sizes.
The Soprano is also known as the Descant recorder and is the one most children start with. I've had mine for many years and, although it was good at the time, there are much better plastic recorders available now. I'm thinking of buying one to match my Alto which is an Aulos 709W and has a lovely tone. My Tenor is a Yamaha YRT304B. Obviously, good wooden recorders are much better than plastic ones but they're also much more expensive so I'm happy with these.
I'll leave you with a video of the Royal Wind Recorder Consort playing a short piece by the wonderful John Dowland. Isn't the recorder a beautiful instrument?
Just recently I've been a tiny bit obsessed with these little things.
Welcome to the world of the weavies. These are small crochet circles with twelve holes round the edge. By threading yarn through the holes in various combinations of straight lines, you can make all sorts of patterns. Little woolly works of art.
In case you're thinking "looks a bit like Spirograph to me", well you'd be right. Want to see my new toy?
This was one of my favourite toys as a child (although my set was much more basic than this one), even though the patterns were frustratingly hard to do. Guess what? They still are. I'm not quite sure why I thought it would be a good idea to get a big set with fancy pieces this time round as it's all I can do to cope with the basic wheels and rings.
Having said that, I have found a few things to help. Following the advice on Spirographic Art, I replaced the blu-tack (which in turn replaced the original pins) with rare earth magnets and a thin sheet of metal. You put the metal sheet under the paper and the magnets, which are very strong, hold the rings in place.
The other thing that's improved in the Spirograph world since the 1960s is pens. Actually, the ones that come with it work pretty well.
But I couldn't resist an excuse to go pen shopping. I've found that Papermate InkJoy gel pens work really well for drawing the patterns and I use Staedler Triplus Fineliners for colouring them in.
My only attempt at layered patterns so far
I hadn't really thought about using the patterns for colouring before but it's fun - even if some of the shapes are ridiculously intricate.
Should you be wondering (and I only know because I looked it up), the grown-up name for Spirograph patterns is hypotrochoid or epitrochoid patterns. The ones you do inside the ring are the hypotrochoids and the outside ones are epitrochoids. So now you know.
Anyway, back to the crochet. No danger of your pen slipping with these. The crochet part is pretty basic really - a few rounds to get to the right size, then a round of eyelets to take the weaving yarn. I finished them off with a nice crab stitch border, not that you can really see that here.
You'll have to take my word for it when I tell you that it gives them a fluted edge, reminiscent of jam tarts (or maybe that's just me). The patterns range from simple ...
... to the slightly more complicated.
Now I got a bit carried away with this whole project and ended up making 24 of these little things - three each of the eight designs I came up with. You may be wondering what on earth I'm going to do with them all. Well, I've made a little mat with seven of them and two lots of bunting.
Oh yes, and I made a big one too, with 24 holes instead of 12; I particularly like that one.
Now it may be that I'm the only person who wants to make this sort of thing but - just in case I'm not - I've turned this whole adventure into a very long pattern and you can download it here. I've included instructions for the eight patterns I did but you could design your own too.
What with these and my venture into knitted stones recently, I think it might be time for me to design something a bit more practical. I do enjoy working on the weird stuff though.
After days of greyness and rain, last Thursday was bright and clear which was just as well as I'd planned a visit to Batsford Arboretum. I go for a walk there several times a year and there's always something exciting to see. At the moment it's the snowdrops' turn to take centre stage.
There were carpets of them everywhere, between the trees and along the streams.
They may be tiny flowers but seeing the first snowdrops is always exciting, a sign that Spring will indeed come.
The arboretum is set on a hill so it can be steep and muddy walking but there are lots of things to chance upon. This little waterfall for example.
The path runs nearly through it so you have to move quickly to avoid getting wet. Then, right at the top of the arboretum, there's a cave.
I always think that the Swallows and Amazons would have made very good use of this. They'd have had a fire lit and broken open the pemmican as soon as they found it.
There are two rather special trees that I always visit at Batsford, both with historical connections. The first is this one.
I know it doesn't look particularly exciting at the moment but this is the Anne Frank tree. During her years in hiding from the Nazis, one of the few links with the outside world was the chestnut tree that she could see from her window. She watched it through the seasons and wrote about it several times in her diary.
13th May 1944. 'Our chestnut tree is in full blossom. It is covered with leaves and is even more beautiful than last year.'
Anne's tree blew down in 2010 but chestnuts from it had been planted and the resulting seedlings were sent to schools and other organisations around the world. This one was planted at the arboretum by the Girl Guides who were celebrating their centenary that year. It stands on the edge of this field, with a herd of red deer for company.
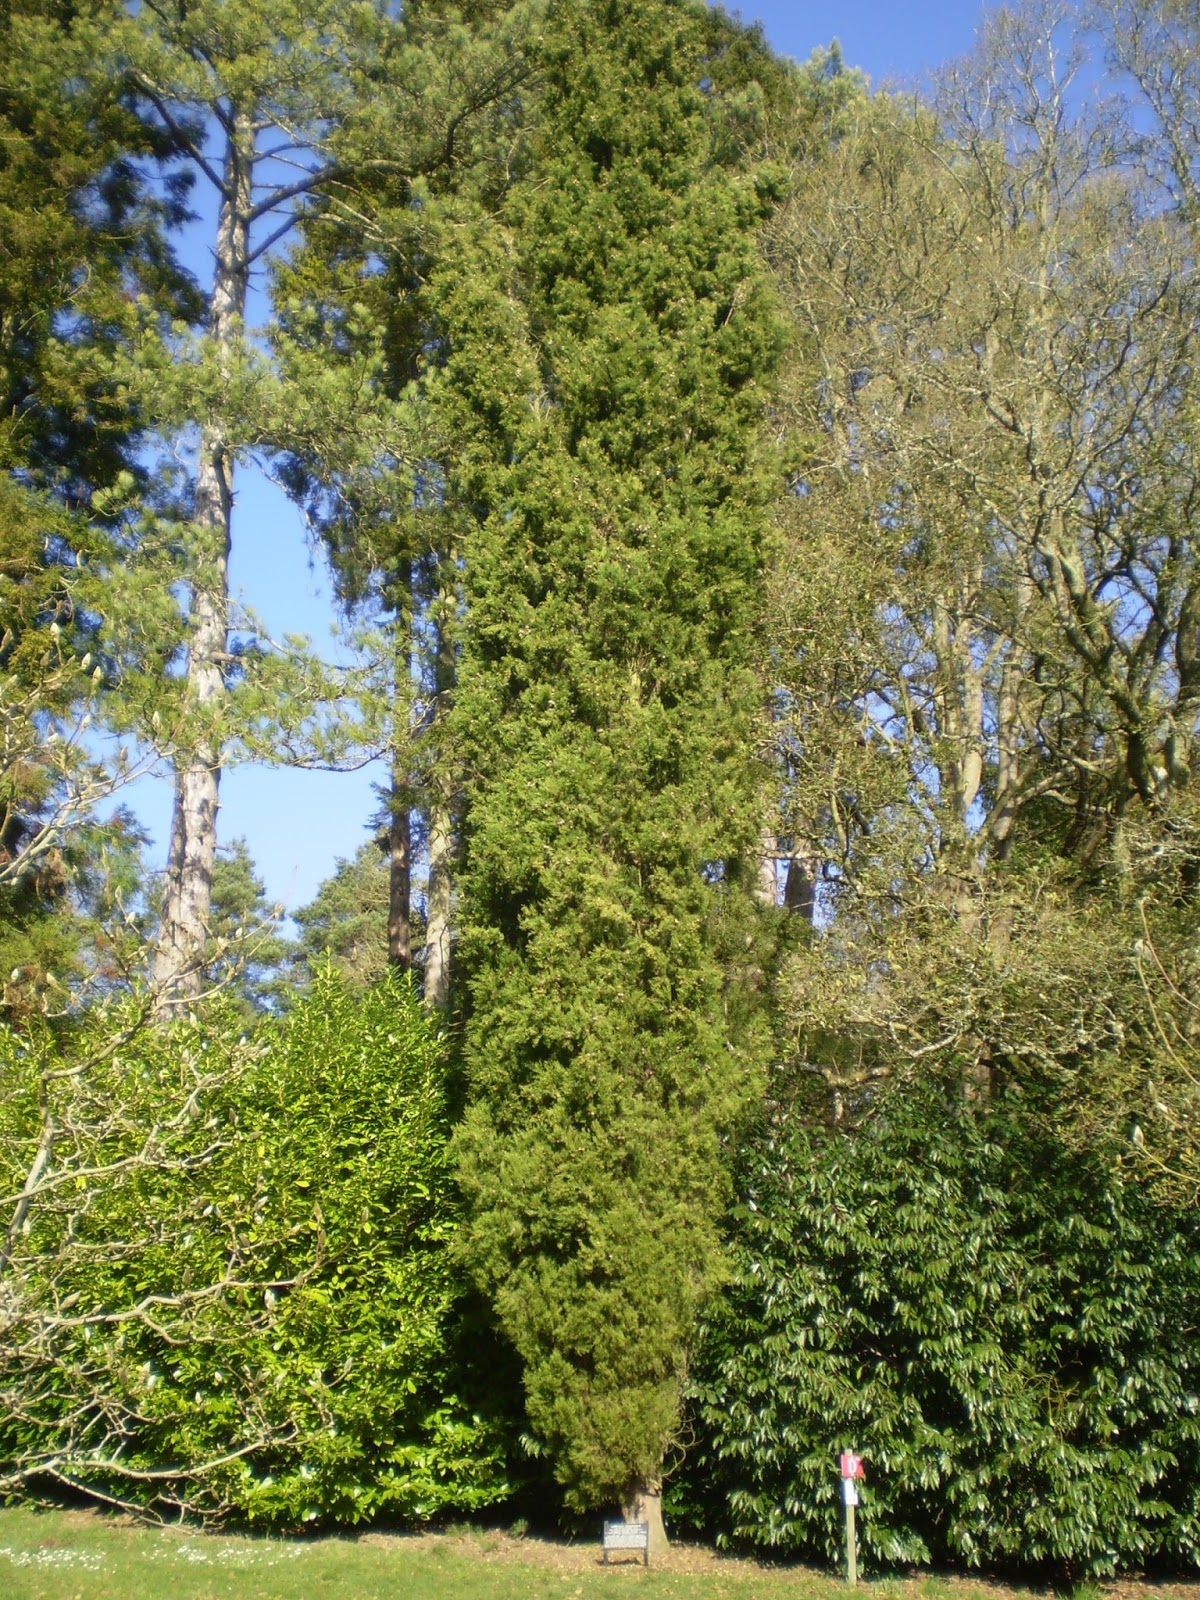
Further up the hill stands this not very exciting Cypress Tree.
But this is another tree with a story. In November 1852 an Eton schoolboy was among the crowds in London watching the funeral procession of the Duke of Wellington. A cone fell from a wreath which the boy picked up and later planted at his home in Hampshire. A cutting from the tree he grew was sent to Brayfield in Buckinghamshire. Then, just over a hundred years after Wellington's death, a cutting from this second tree was planted at Batsford. Which makes this tree the great-grandchild of the funeral wreath. I wonder how many people have picked up cones to grow the next generation of Wellington's tree.
The arboretum is part of the Batsford Estate, based around this rather fine house.
This is perhaps best known as the home of the infamous Mitfords, although they sold the house after the First World War. This is the view down towards the house from the top of the hill. On the other side of the house is this rather peaceful lake (complete with a duck house on the island).
Sometimes there are black swans swimming on the lake but there were none to be seen this time.
If there's one thing I love, it's a picnic and the spot I found for my lunch had a beautiful view.
I have no idea what I was looking at but there was certainly a lot of it. It was so good to just sit and breathe in all that green-ness, even if it was a bit cold. My trusty flask of tea was much needed.
Next time I visit it will be warmer and maybe the Magnolias which are in bud now will be blossoming.